
Compendium
Trails in the Sky 2nd Chapter — Guides & quests
Entries: 195
Compendium
Chapter Walkthroughs & Bracer Requests
No matching content.

Before departure, learn about the cooking from Phyllis and prepare Orbment from Robert. The comprehensive training target is deep in the Balustal waterway; in the forest section after the late-night attack, first retrieve the equipment and check the guide board.
Three sets of eyewitness testimonies were collected surrounding Luan's White Shadow investigation. The association's commissions include lighthouse commissioning, Sunday school lectures, photography and food materials, etc. File separately before answering the question.
Investigate earthquakes and their source areas in Chase, and use the central workshop for preparations. The focus of the branch includes signboards, training, firearms testing and parts recovery; firearms testing requires correct equipment and does not count retreat.
The main plot revolves around Albert's departure from the palace, threatening letters and Renne. Before advancing to the tea party, you can check the royal capital to accept the request; clues of the missing exhibits will connect the residence, square, embassy and arena.
Fog Investigation first, then deal with the lethargy incident and farm safety. Commissions such as fishing spots, lost cats and rings can be combined with regional exploration; check the current commission records before key plots.
Handle wanted Warcraft and Ancient Dragon events according to the main line. Traditional cooking recipes, secret medicines and mine commissions all require additional exploration. You can check back from the key tasks and prop sources in this information.
Advance from lounging by the lake to infiltrating the Society's research facility. Prepare the whole team before the important stage, pay attention to the long story and the equipment, Quartz and recovery methods after the team changes.
With the help of El Saiyu's facilities, advance through the Emerald, Red Lotus, Cyan, and Amber Towers. After each tower is processed, confirm the corresponding main line update before proceeding to the next section.
Restore branch communications in Perth, Luan, Chase, and Lorente, and then respond to the crisis in the capital. When traveling to multiple places, simultaneously check the commissions and missing collections that are still available.
Advance through the multi-stage exploration objectives of the floating city and finally enter the root area. Supplies before the final battle and saves the data; after the plot ends, follow the emergency escape route to complete the evacuation.
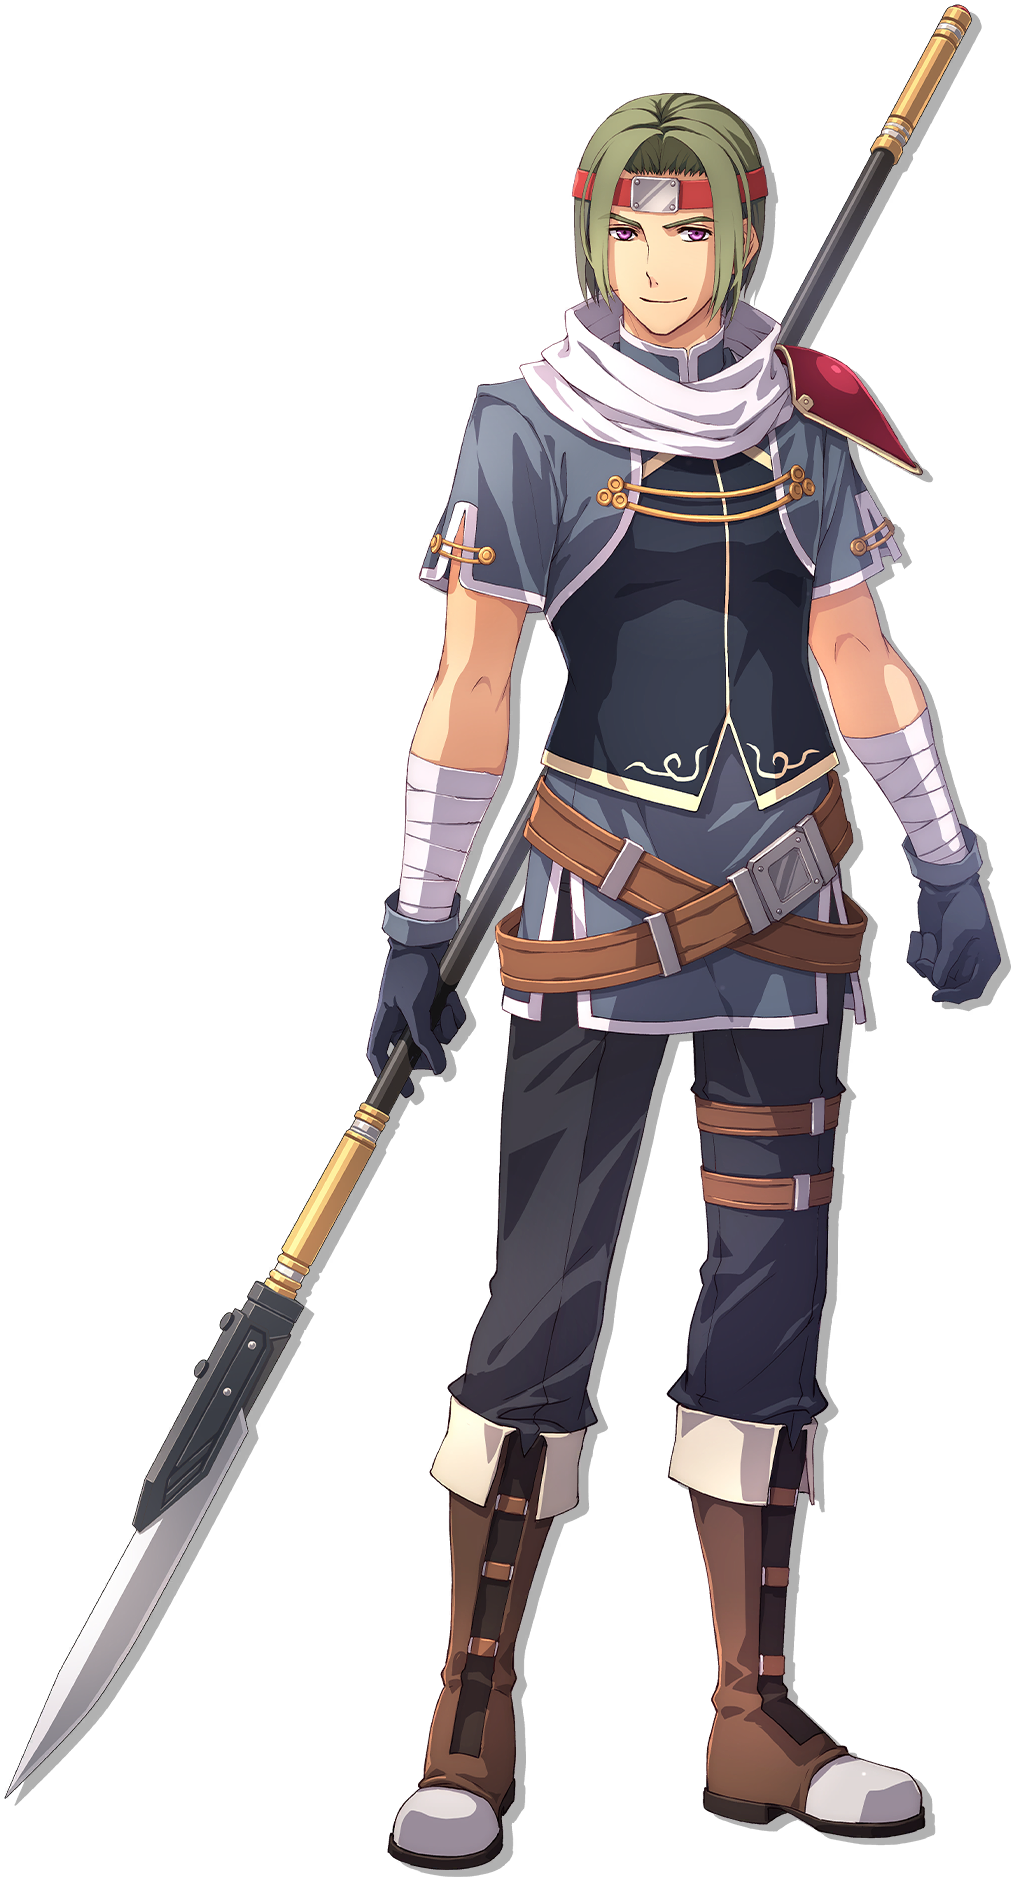
I've come to the Le Locle Training Grounds to further hone my skills as a senior bracer. It sounds like today's training is going to be especially tough. I'd better make sure I'm well-prepared before heading out.
It's finally time for the last leg of our training. We have to head to the Balstar Channel. The training facility is in a renovated medieval ruin. We need to stay focused and push on!
Something unexpected happened during the night. The barracks were attacked by some mysterious intruders! Who are they and why did they do it?!
Their motive is still unclear, but yesterday's attack on the barracks was definitely the work of the jaeger corps. ...And Kurt has been captured by them. We need to find more information. The plan is to return to the barracks and see if we can spot any clues.
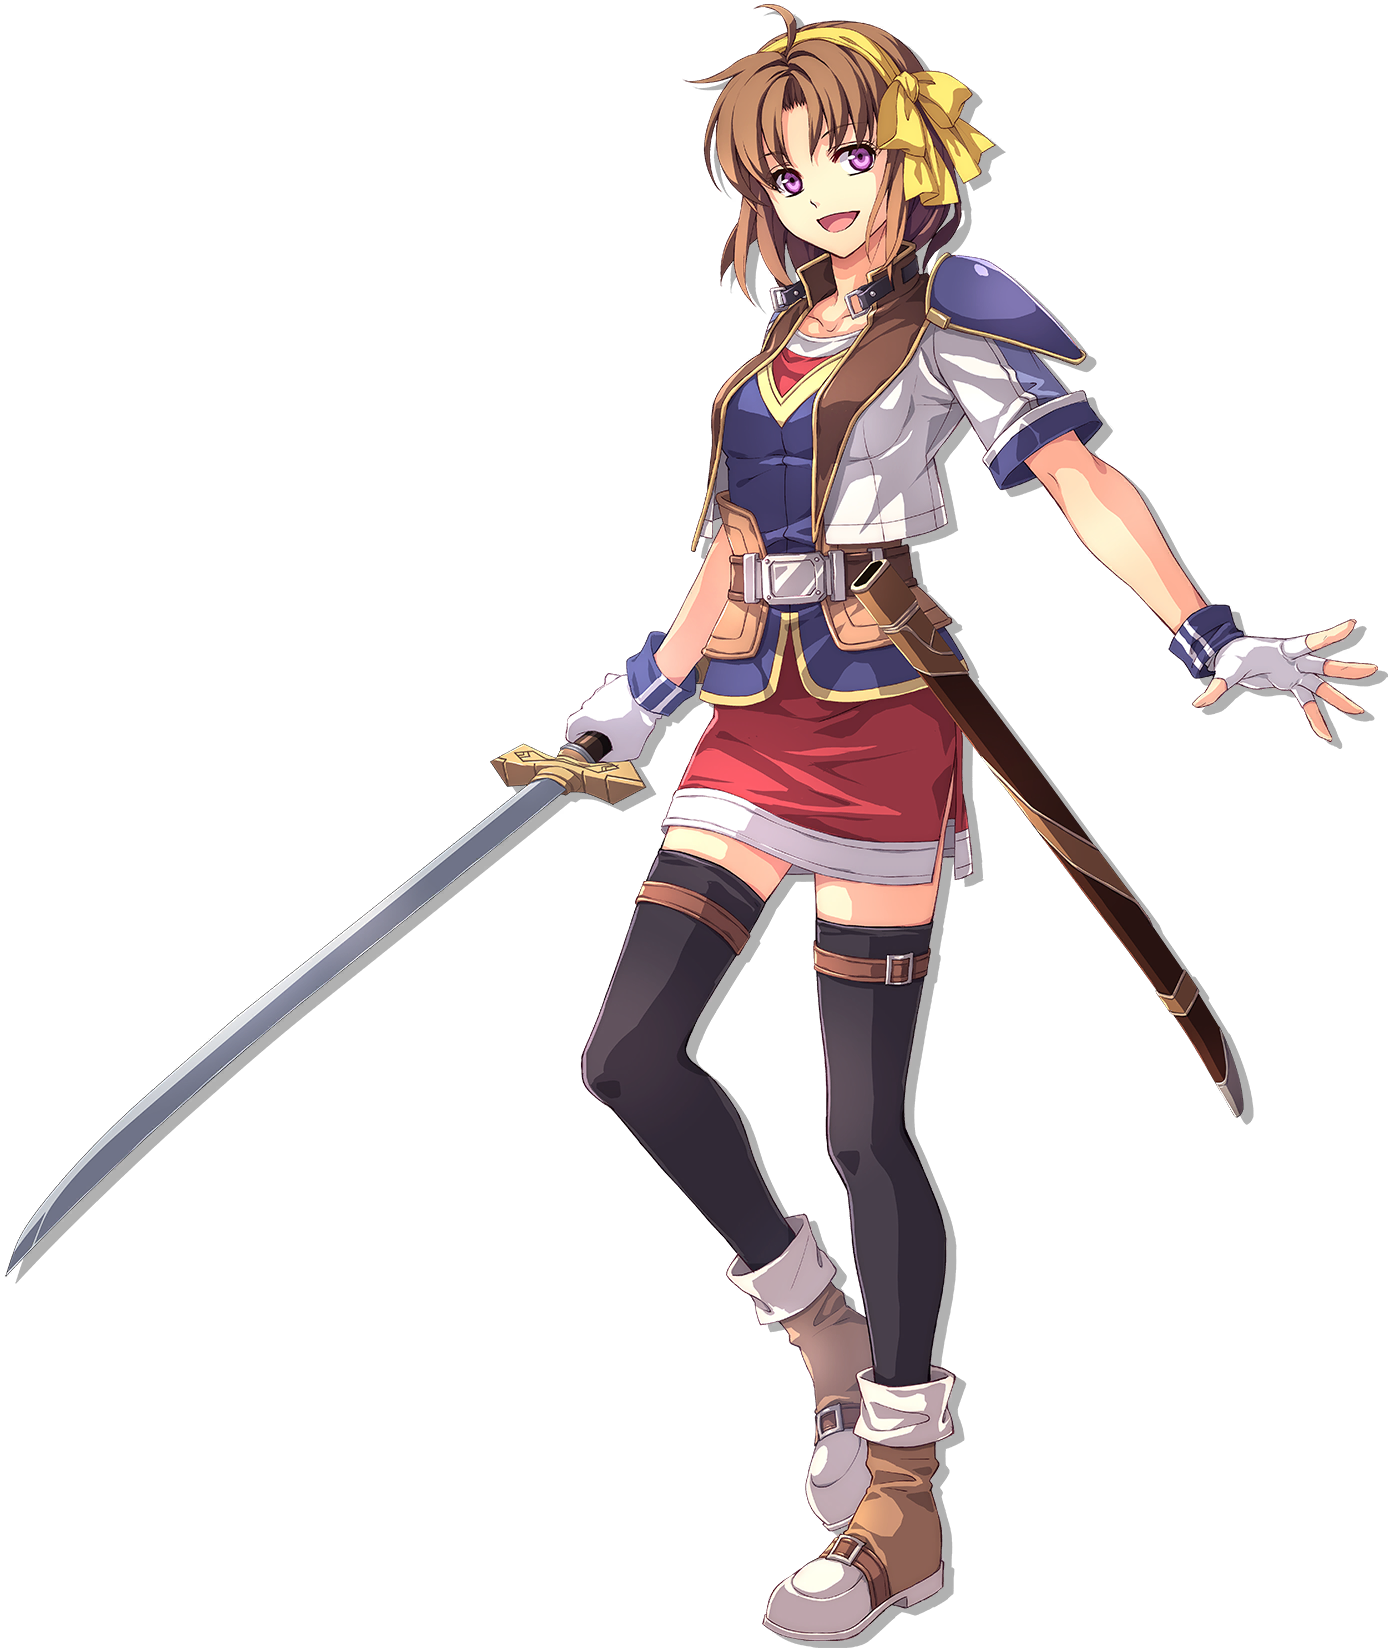
Schera and Agate are splitting up to begin investigating the Society. Anelace and I will each accompany one of them. The plan is to travel around the kingdom, taking on requests and keeping our ears open for any information on the Society.

Ask about the three newly found groups of witnesses: prison guard Soldier, Raven Gang related personnel, and orphanage children.

The 'white shadow' was seen heading off in three directions... Putting them together, it looks likely that it came from somewhere around the Jenis Royal Academy.

The 'white shadow' flew off toward the old schoolhouse. We need to head there right now!

A sudden earthquake struck Zeiss. Apparently, a similar quake happened at Wolf Fort a few days ago. But the City of Zeiss didn't even feel the slightest tremor when that one happened. It doesn't quite sit right that it was just a natural phenomenon. Looks like we need to dig a little deeper and find out more.

Following the earthquakes in Zeiss and at Wolf Fort, there's been another at Sanktheim Gate! As soon as we heard the news, we rushed over to Sanktheim Gate to start investigations right away.

With Professor Russell's invention, the septium vein measuring device, we might be able to solve the mystery of all these earthquakes. We need to make sure we put them all in place before the next quake strikes. We'd better hurry and get them in position.

A fourth earthquake has shaken Zeiss. This time it was at Leiston Fortress. It was caused by somebody intentionally distorting the septium vein flow. The source of the distortion was deep inside Elmo Hot Springs. We need to get there now.

It seems a lost child believed to be a tourist's child was taken into protection at Erbe Royal Villa. We should help find their parents.

We need to question people about the threatening letters while we try to find out more about Renne's parents.

On the brink of the signing of the non-aggression pact, several threatening letters have showed up around the kingdom, threatening to derail everything. The Royal Army have issued an official request for us to carry out investigations in various locations.

It looks like Renne disappeared while we were discussing our next steps at the guild. We need to find her, fast.
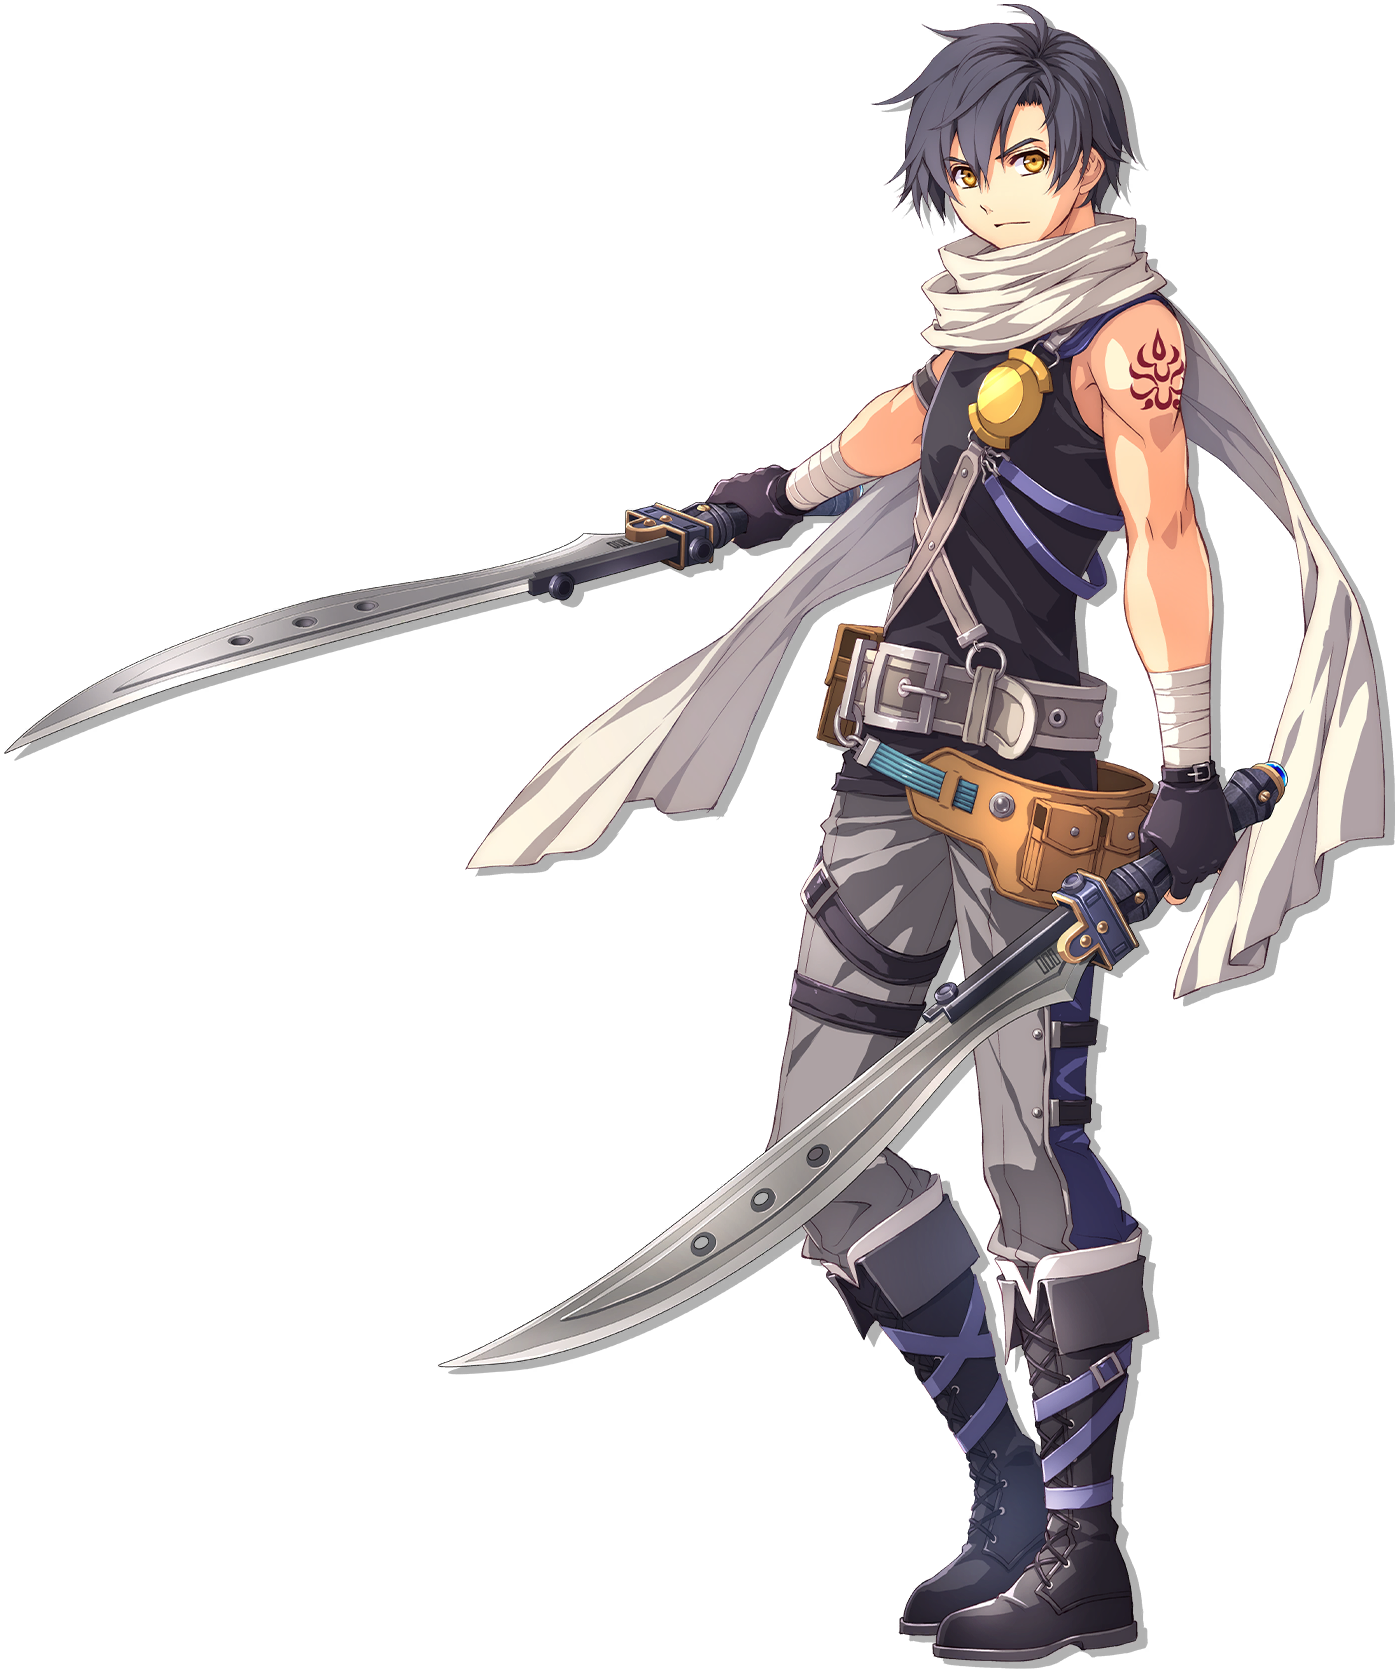
Renne gave me a letter. The sender wants to meet with me tonight, just the two of us, on top of Ahnenburg Wall. Based off how Renne described the sender and judging by the handwriting... I'm sure it has to be Joshua!

When we got back to the guild, we found everyone unconscious, and a letter that said: 'We have the girl and the Duke.' 'If you want them back, come to the tea party.' It must be what's left of Special Ops behind this, probably with the Society pulling their strings. ...I guess we have no choice but to go find out.
A sudden fog has descended all over the Rolent region. It could be some kind of abnormal phenomenon caused by the Society. We'd better hurry up and investigate.

Four citizens of Rolent have suddenly fallen into unexplained comas. It's got the Society and their Gospel experiments written all over it. If they are behind it, then there should be some kind of 'message' somewhere. We should start by talking to people connected with the four victims.
The fog is even thicker than yesterday. It's reaching as far as Perzel Farm and Malga Mines now... It's very likely that the coma cases kicked off in the fog. We need to hurry and bring Tio and the others to the safety of the town.

Ridge heard a bell when he was on his way back to the capital. He was near Mistwald at the time. The 'woman in black' must be there, too. There's a high chance this could be a trap, but we have to go investigate.
There's been an increase in wanted monster requests in Bose recently. There are three that still need dealing with. We should take them all out, one by one.
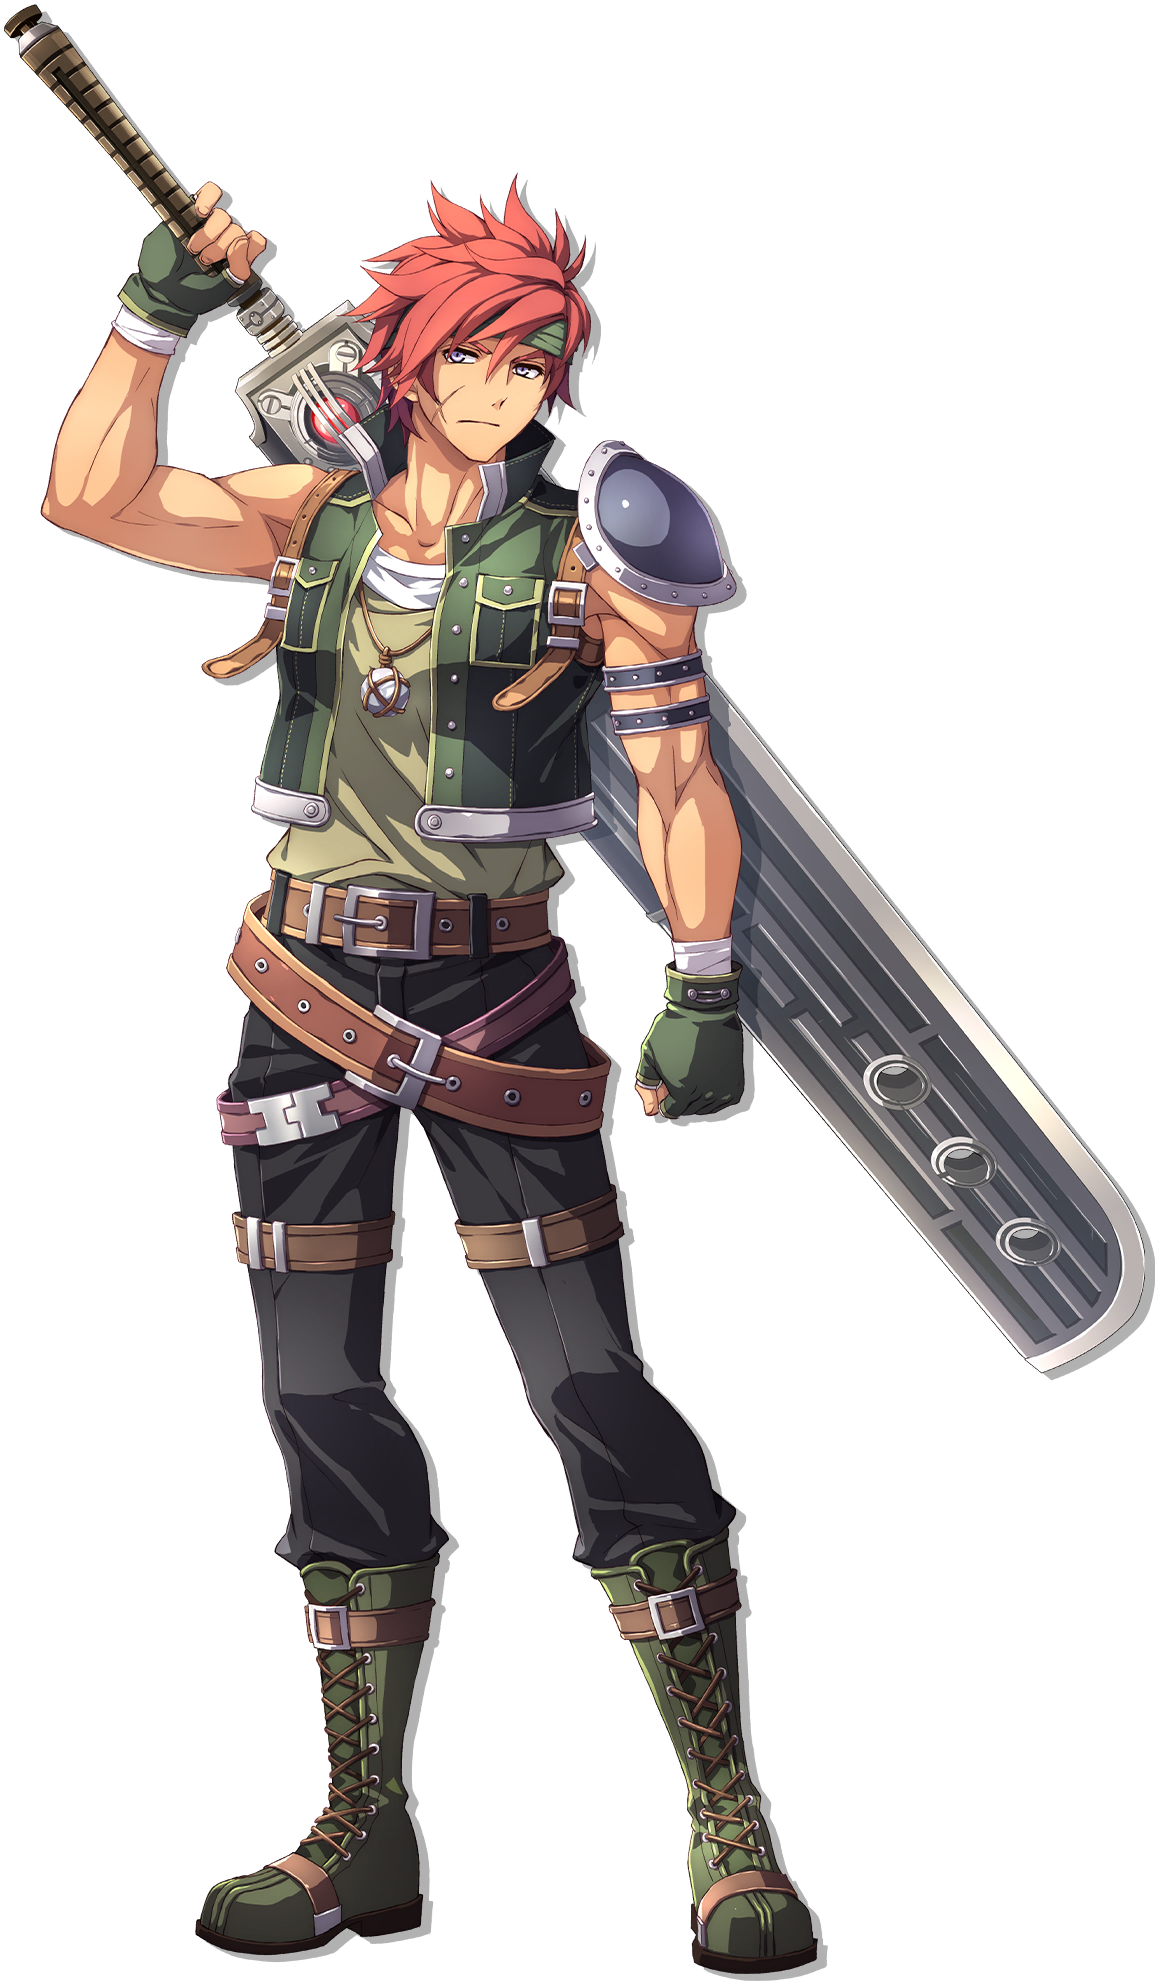
The ancient dragon that attacked Bose seems to have showed up in Ravennue Village. Agate's already on his way. We need to get there fast.
The Royal Army will be beginning 'Operation Dragon Capture' imminently. We have been allowed to take part in the mission, but only as observers. Even in this role, we still need to stay sharp. Our opponent is an ancient dragon... so anything could happen.
The dragon flew off to the northwestern part of Nebel Valley. Apparently, it's an impossible area for airships to navigate because of the very thick fog. There's also the worry that a large group of people heading in might alert the dragon and he'll just fly off again. And this is where we bracers step in! We're heading for the valley, and we're going to catch that dragon!

Mayor Maybelle gave us special vouchers for the Kingfisher Inn. Taking time out to relax is an important task, after all. We should rest while we can.
Thanks to intel from Kurt, we pinpointed the location of the Society's base. I'm worried about Anelace and the other bracers that were captured. There really is no time to lose. We decided on a team of four and immediately moved to infiltrate their base.
I was captured deep inside the research facility and brought onto the Society's airship, the Glorious. The Professor and Renne are nowhere to be seen right now, so this is my chance to escape. I have to get out of here somehow.
The order is based on the main mission stage; the treasure chests and enemies in the tower are also searched for locations, treasure chests and combat units.
A list is a collection of delivery targets; the arrangement of records is not treated as a forced shortest path.
While we were on Royal Avenue, we spotted the Society's airship. It was headed for the capital.

The true form of the Aureole lies somewhere in the floating city. If only we can find it, maybe we could put an end to the crisis that has taken over Liberl. We must board the Arseille and head for the floating city at once!
The Park District 'Calmare', and the Residential District 'Cradle'... The sheer scale of this place is mind-boggling. Still no clues on the Aureole. We need to keep on searching.
The Axis Pillar is right there. Loewe, the Professor, and the others should be inside the tower. We need to get ready and then get climbing.
Contains spoilers for the final chapter; does not claim to have verified all stage moves and the lowest level route.

Looking for somebody to compile a list of ingredients in Ruan. It's a simple and fun job you can do in your spare time. If interested, please come to Manoria Village. Visit the guest room on the second floor of the White Magnolia, where our company representative will explain everything. P.S. No experience necessary!

This task involves traveling to the Sapphirl Tower in order to take a picture. Necessary equipment will be provided. For more details, please make your way to Room 101 of Hotel Blanche and speak with a researcher named Santos.

Vogt from Varenne Lighthouse has indirectly asked us to do a job for him. Our task is to carry out a test run of the lighthouse, and apparently there's an instruction manual on the bookshelf. We'd better read that first.
Urgently seeking bracers to teach a lesson at our Sunday School. The requirement is to educate the children about the Bracer Guild's duties and mission. If you are available, please report to Ruan Chapel as soon as possible. Sister Frieda will be able to provide further information.
The Langland Bridge seems to be malfunctioning lately. With the mayor away, nothing is being done about it, so it would be great if some bracers could take a look. You can find me in the election office on the second floor of the Aqua Rossa Bar.
A dangerous monster known as [Queen Viper] has appeared on Vista Forest Road. We request immediate assistance from bracers affiliated with this branch. *Note: This monster specializes in venom attacks. Prepare anti-poison equipment before approaching.
A dangerous monster known as [Cobalt Saber] has appeared on Gull Seaside Way. We request immediate assistance from bracers affiliated with this branch. *Note: This monster has extremely high defense. Prepare arts before engaging.
A dangerous monster known as [Hapilsag] has appeared on Krone Trail. We request immediate assistance from bracers affiliated with this branch. *Note: This monster has venom in its tail. Prepare anti-poison equipment before approaching.
A dangerous monster known as [Ash Saber] has appeared on Aina Causeway. We request immediate assistance from bracers affiliated with this branch. *Note: This monster has very high resistance to arts. Strengthen physical attacks before challenging it.
A campaign worker was assaulted by somebody at the election office on the top floor of the hotel. There's a suspicion that the culprit was one of the Portos supporters, but nothing has been proven yet. The hotel staff must be questioned so that the truth can be uncovered!
Are you a keen gambler? Then come on down to Lavantar Casino & Bar! * More details to be given in person. Come find me on the first floor. Thanks, Lakeisha.
The location chain is given in the mission phase; the precise interaction point is based on the surveyable objects on site.
For the attention of Estelle Bright. The Royal Army at Leiston Fortress is currently conducting a short-term special training exercise. We hope that you, as champions of the martial arts tournament, will participate in the training. If you are able to attend, please come to Leiston Fortress as soon as possible.
The fifteen game record itself does not prove the specific additional BP value; the full score reward is not made up here.

Locations and quantities come from eight discovery records in the mission log.
There are rumors of a Peeping Tom lurking around the open-air bath. If anybody has some free time, please stop by in Elmo. Ask at the reception of the Maple Leaf Inn for more details.
A dangerous monster known as [Neptune Frog] has appeared in Kaldia Tunnel. We request immediate assistance from bracers affiliated with this branch. *Note: This is an amphibious monster with resistance to physical attacks. It may also summon allies.
A dangerous monster known as [Mantrap] has appeared on Tratt Plains. We request immediate assistance from bracers affiliated with this branch. *Note: This monster emits a poisonous gas which can cause various status abnormalities.
A dangerous monster known as [Ya-Kah] has appeared on Tratt Plains. We request immediate assistance from bracers affiliated with this branch. *Note: This monster specializes in blood-sucking attacks. It also has a high recovery ability.
A dangerous monster known as [Mustang Saber] has appeared on Soldat Army Road. We request immediate assistance from bracers affiliated with this branch. *Note: This monster is extremely physically powerful. The darkness it spreads steals its prey's vision... and its life.
The archaism [Gandor] has appeared in Grancel Sewers - North Block. We request immediate assistance from bracers affiliated with this branch. *Note: Few details are known. There are reports it calls for reinforcements.
A dangerous monster known as [Hurricaneberg] has appeared on Kirsche Avenue. We request immediate assistance from bracers affiliated with this branch. *Note: This monster is capable of powerful attacks that affect all targets. Said to be weak against earth-based arts.

A hotel guest who went off sightseeing has failed to return when expected. We urgently request assistance in locating him. For more information, please ask at the hotel reception.
Each location corresponds to the mission log's card discovery or recovery status.
It seems some premium-quality fish that was intended for the banquet after the signing ceremony has been stolen from the Grancel Castle's pantry. I wonder if some bracers may be able to come to our aid.
A dangerous monster known as [Rhinoking] has appeared on Erbe Scenic Route. We request immediate assistance from bracers affiliated with this branch. *Note: This monster has extremely tough skin. Prepare arts before approaching.
A dangerous monster known as [Giant Tree] has appeared in Grancel Sewers - West Block. We request immediate assistance from bracers affiliated with this branch. *Note: This monster specializes in life-draining attacks. Said to be weak against fire-based arts.
A dangerous monster known as [Master Wisdom] has appeared on Elize Highway. We request immediate assistance from bracers affiliated with this branch. *Note: This monster makes full use of powerful arts. Make sure you have the right equipment.
A dangerous monster known as [Big the Yeti] has appeared on Milch Main Road. We request immediate assistance from bracers affiliated with this branch. *Note: This monster is capable of extremely powerful physical attacks. It also specializes in ice-based attacks.
A dangerous monster known as [Guilder Quake] has appeared at Esmelas Tower. We request immediate assistance from bracers affiliated with this branch. *Note: This monster is capable of powerful attacks that affect all targets. Be sure to check everyone's equipment before approaching.
A dangerous monster known as [Death Specular+] has appeared on Milch Main Road. We request immediate assistance from bracers affiliated with this branch. *Note: This monster specializes in mind attacks. Prepare equipment that prevents confusion.
The sacred symbol of our love — our precious, precious engagement ring—has been snatched by a black demon! Please, lend a hand to some poor lost lambs! We await your arrival at the chapel. Armand ❤ Ellie
The Fisherman's Guild is currently seeking previously unknown fishing spots across the Rolent region. Anybody is welcome to take part, from fishing pros to expert investigators. It's a bit of a trip, but please put your name down for the job at Gurune Gate.
I need help locating my missing cat. You can find me in a guest room on the first floor of Hotel Rolent. –Ida
A dangerous monster known as [Blade Fang] has appeared on the Krone Trail. We request immediate assistance from bracers affiliated with this branch. *Note: This monster has extremely powerful physical attacks. Ensure you're well-equipped before approaching.
A dangerous monster known as [Octobone] has appeared at Amberl Tower. We request immediate assistance from bracers affiliated with this branch. *Note: When wounded, it summons allies. Take care not to get overwhelmed.
A dangerous monster known as [Ghost Epitaph] has appeared in Nebel Valley. We request immediate assistance from bracers affiliated with this branch. *Note: This monster specializes in ice-based attacks. Ensure you're equipped to deal with that.
A dangerous monster known as Gold Spinner has appeared on Ravennue Trail. We request immediate assistance from bracers affiliated with this branch. *Note: This monster specializes in petrification attacks. It also carries out attacks that can cancel arts activation.

The multiple "don't know" names in the log are records of the inquiry process, not the order in which they must all be executed.
Go to the clock tower to find Anton to accept the commission.

Someone stole the commission letter for Malga Mine, an important document bestowed upon me by Her Majesty the Queen, and it must be recovered at any cost. If you can help, please come to my residence on the second floor of the apartment building in the southeast of Rolent. – Mine Chief Garton
A medal belonging to Ambassador Crainagh of the Erebonian Embassy has been stolen. The Erebonian Imperial Delegation hereby requests the full and immediate aid of the Bracer Guild. For further details, please contact the address below. Imperial Embassy Contact: Room 203, Frieden Hotel.
We need a large quantity of rare delicacies for our new menu. Some of them may be difficult to obtain, but we'd very much appreciate some help. For more details, please speak with Gwen in the kitchen of Restaurant Anterose.
A young lady has gone missing. Please help find her as soon as possible. Ask Reina for more details. I will be waiting at Restaurant Anterose. *Look for the Royal Academy uniform.

Looking for a bracer to act as an escort to Ravennue Village. The person to be escorted is a young woman. The request is one-way, for the outbound trip only. Contact: Milano, 2F Torino Residence, 1-1 Central Street, South Block.

I'm trying to track down a relative who went missing ten years ago. I will provide more details in person. You can find me at Kirsche Bar.
Unidentified monsters have been spotted inside the Ravennue Mine. It seems the Royal Army doesn't have the manpower to handle it.
A dangerous monster known as [Red Fang] has appeared on Krone Trail. We request immediate assistance from bracers affiliated with this branch. *Note: This monster carries out very powerful direct attacks. Check your armor before approaching.
There are reports that the archaism [Doom Type S] has appeared on New Ansel Path. We request immediate assistance from bracers affiliated with this branch. *Note: Few details are known. There are reports that it excels at long-range attacks.
There are reports that the archaism [Vanguard] has appeared on Elize Highway. We request immediate assistance from bracers affiliated with this branch. *Note: This archaism has a wide range of attack capabilities. There are reports of it self-destructing.
A dangerous monster known as [Devil Spear] has appeared on Milch Main Road. We request immediate assistance from bracers affiliated with this branch. *Note: This monster possesses deadly venomous needles. Watch out for its one-hit-kill direct attacks.
There are reports that a [Balancing Clown] has appeared on Gull Seaside Way. We request immediate assistance from bracers affiliated with this branch. *Note: Few details are known. Proceed with caution.
A dangerous monster known as [Ebony Scale] has appeared at Sapphirl Tower. We request immediate assistance from bracers affiliated with this branch. *Note: This monster is capable of powerful attacks that affect all targets. Its overall specs are high, so proceed with caution.
A dangerous monster known as [Blade Cougar+] has appeared on Ritter Roadway. We request immediate assistance from bracers affiliated with this branch. *Note: This monster is trained for combat. Watch out for its one-hit-kill physical attacks.
A dangerous monster known as [Abyss Worm] has appeared on Tratt Plains Road. We request immediate assistance from bracers affiliated with this branch. *Note: This ring-shaped monster has also been spotted at the source of Elmo Hot Springs. Handle with care.
A dangerous monster known as [Evil Stream] seems to have appeared in Grancel Sewers - West Block. We request immediate assistance from bracers affiliated with this branch. *Note: This monster utilizes powerful arts. There are also reports that it has blood-sucking attacks.
A dangerous monster known as [Big Cactus] has appeared on Erbe Scenic Route. We request immediate assistance from bracers affiliated with this branch. *Note: This monster specializes in needle-based attacks. It is also able to enhance the abilities of other monsters.
A dangerous monster known as [Rising Panda] has appeared on Gull Seaside Way. We request immediate assistance from bracers affiliated with this branch. *Note: This is a fierce monster thirsty for flesh and blood. Carelessness could be deadly.
A dangerous monster known as [Divine Pengu] has appeared in Kaldia Tunnel. We request immediate assistance from bracers affiliated with this branch. *Note: This is a noisy, flashy monster. Watch out for its confusion attacks.
The orbal shutdown has caused the elevator in Malga Mine to shut down. Ridge and some miners are still stuck underground. We have to rescue them somehow!
The Royal Academy has suffered a surprise attack by the Society! We can't afford to wait for the army on this one. If we want to liberate the academy, we have to act now.
The hot springs in Elmo Village are unusable at the moment. It looks like it might be something to do with the pump system... There should be a way to fix it. Action needs to be taken to get the hot springs up and running again.
Apparently, Old Man Lugran, the receptionist at the Bose Bracer Guild, has a chronic heart condition. Another attack could be life-threatening. The ingredients for his medicine need to be gathered quickly...
Reverse the details of Items to check Shop, drops, treasure chests, exchanges, cooking and Quartz synthesis.
Check the attributes and abnormal resistance first, prepare a team that can continue to recover, and then arrange the outbreak window.
Completing quests awards base BP; dialogue choices and optional objectives may grant extra BP.
Preemption, stun and action sequence management are the common focuses of both combat modes.
The dishes you have eaten will be entered into the manual; the team rewards made for the first time are worth claiming in time.
First accept the commission, complete the team's functions, and then advance the key plot. Incorporate cooking and Orbment preparation into a fixed cycle.
The target fish must match both the location and the bait relationship; the fishing rod also affects the available combinations.
Magic is unlocked according to the attribute value of each orbment line; it is not a simple addition of all Orbment attribute values.

You can adjust certain controls in the Options Menu.
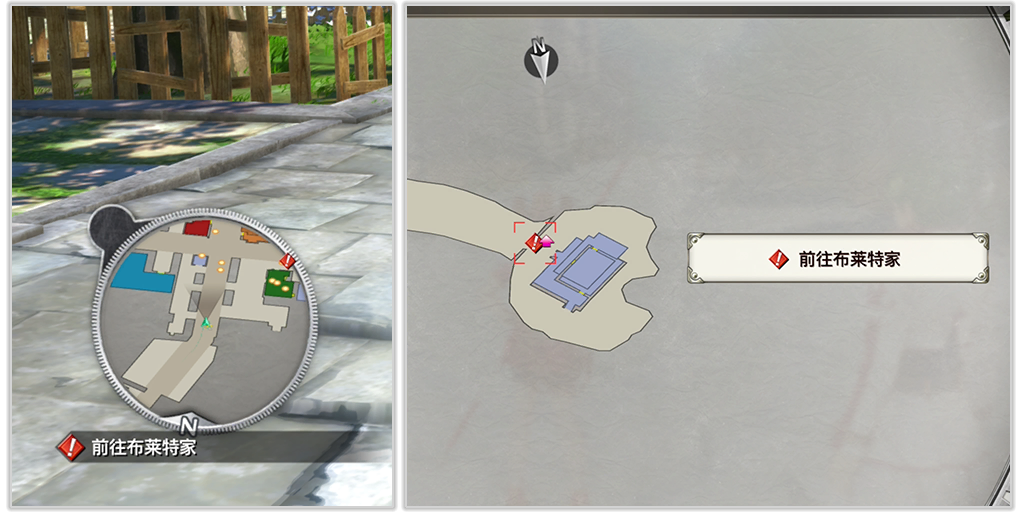
Check your navigation and head toward the [story event marker] to advance the story.
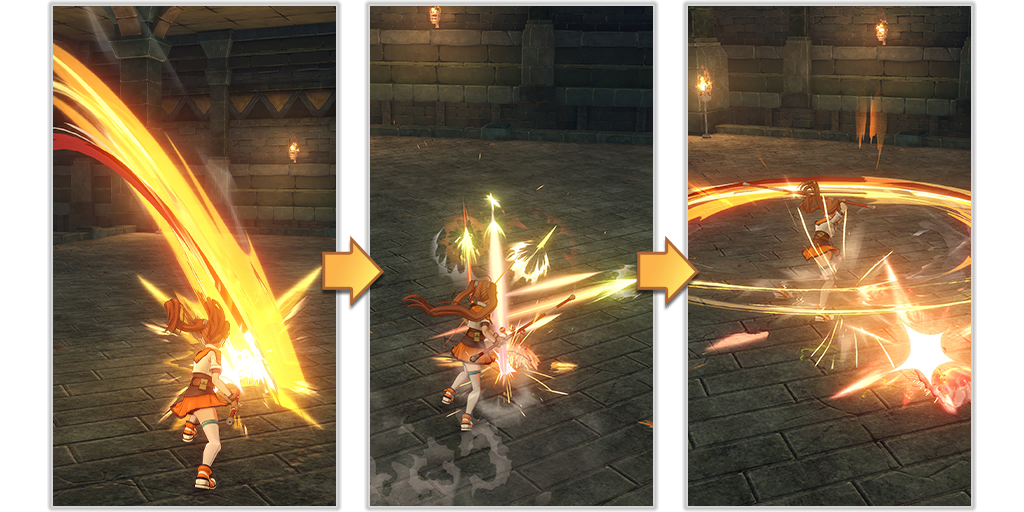
Attack by pressing [control button]. Press repeatedly for consecutive attacks.
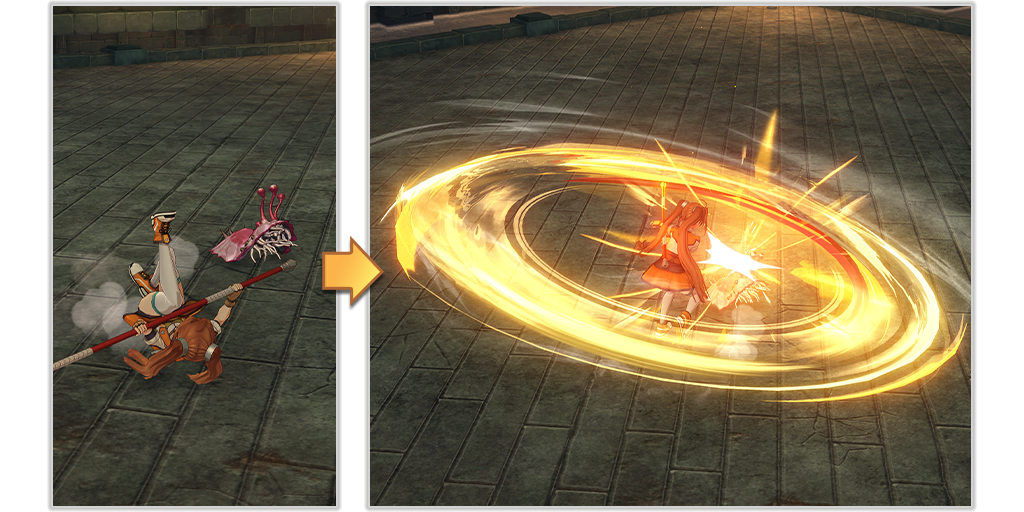
Dodge by pressing [control button]. After a dodge, press [control button] to perform a jump attack.
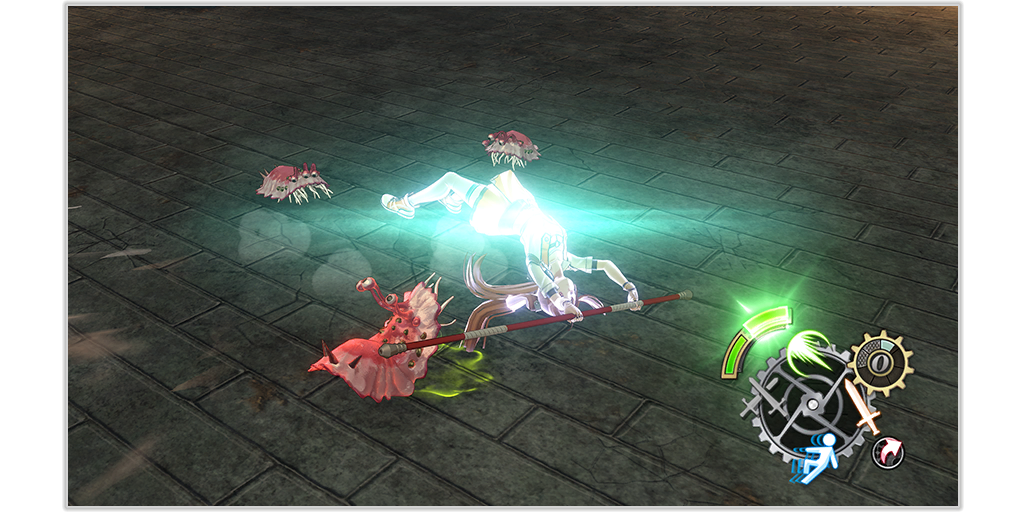
If you dodge an enemy's attack with perfect timing, your charge gauge fully recovers! Immediately use [control button] to counter with a Craft Attack!
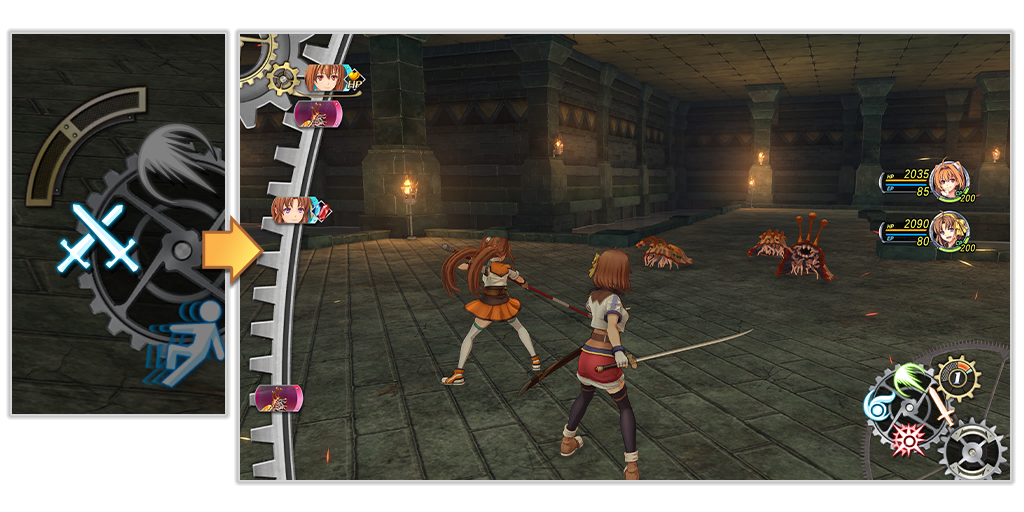
Switch tactics by pressing [control button]. You can switch from Quick Battle to Command Battle at any time.
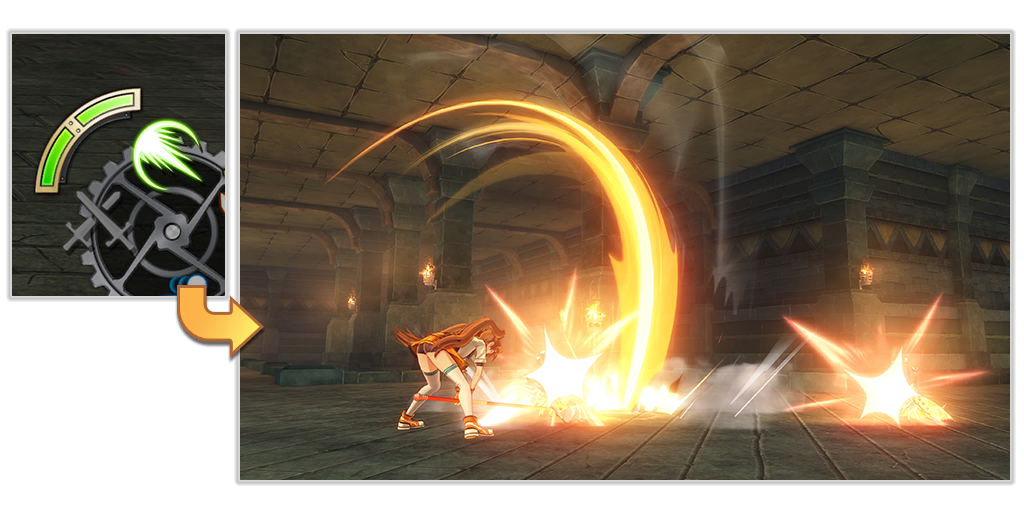
Charge your gauge and press [control button] to unleash a Craft Attack. You can activate it up to 2 times consecutively. It deals high damage and easily stuns enemies.
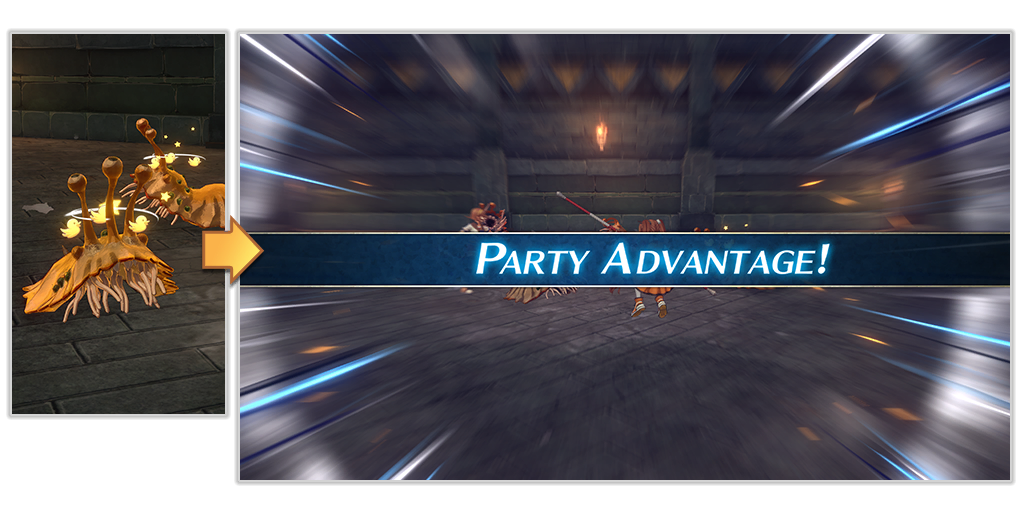
If you stun an enemy during Quick Battle and switch tactics with [control button], you can immediately initiate a Brave Attack.
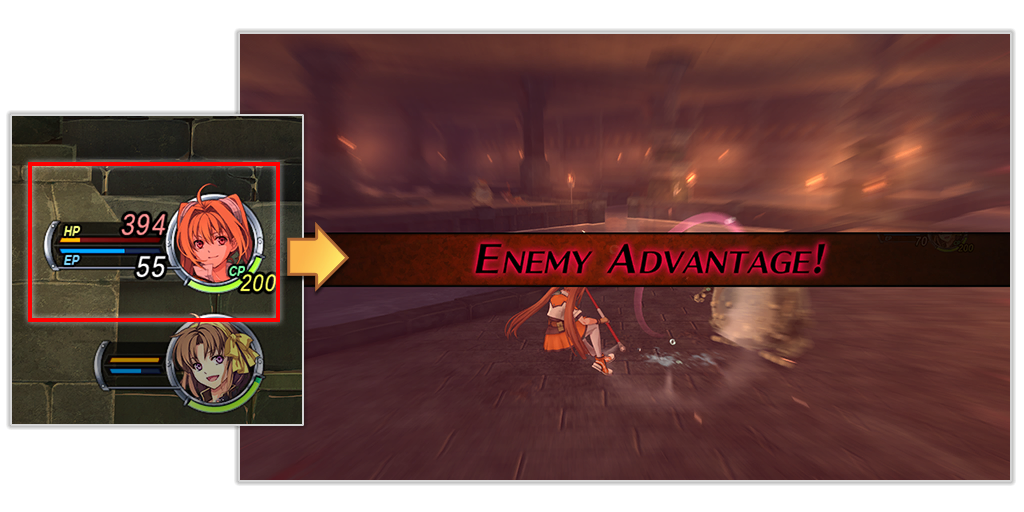
If the leader is attacked while in a critical state, a Command Battle begins with Enemy Advantage! The enemy will act first.
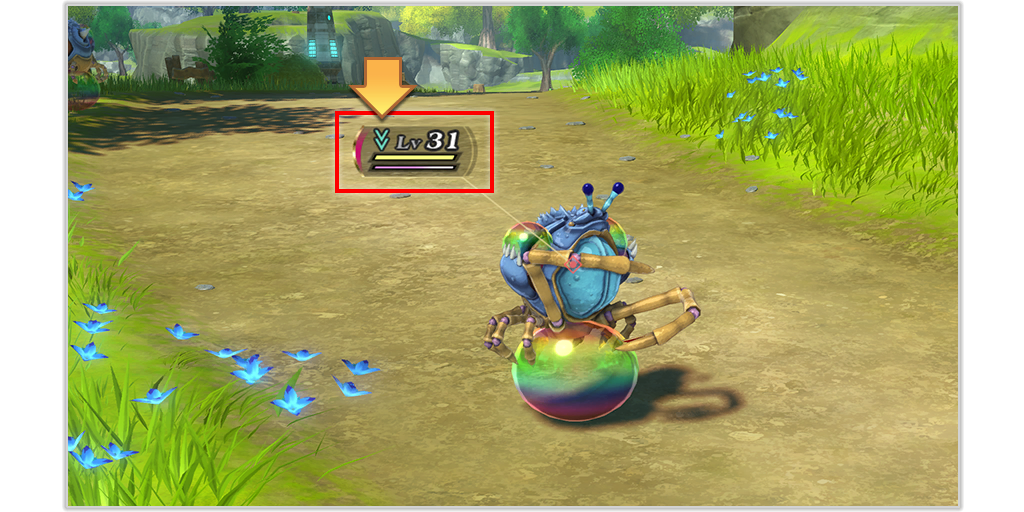
When facing lower-level enemies, damage and stun damage dealt increase. *Excludes strong enemies and bosses.
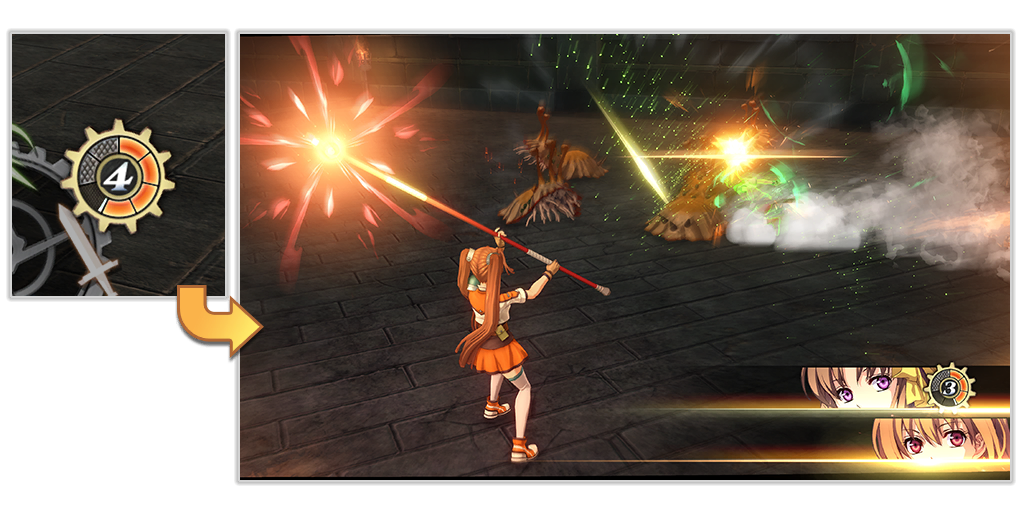
Press [control button] to activate a Brave Rush with your Leader and Allies! Consume 2 Brave Gauge points to unleash a coordinated wide-area attack!

Press [control button] to switch menus. You can select Items, Guard, or Retreat.
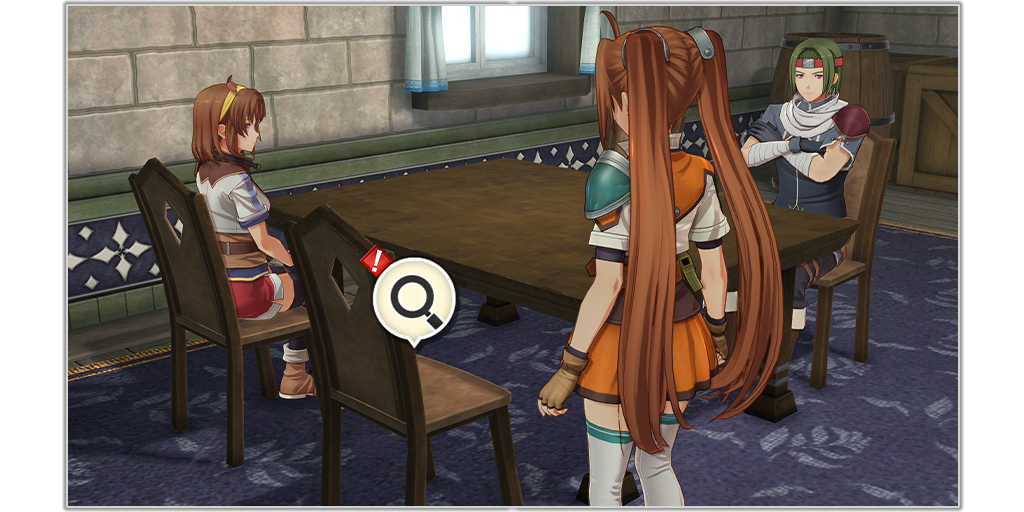
Markers indicate locations or characters where various events occur. [story event marker] Main Events (Viewing these advances the story) [request marker] Sub-Quests [side event marker] Sub-Events and Other
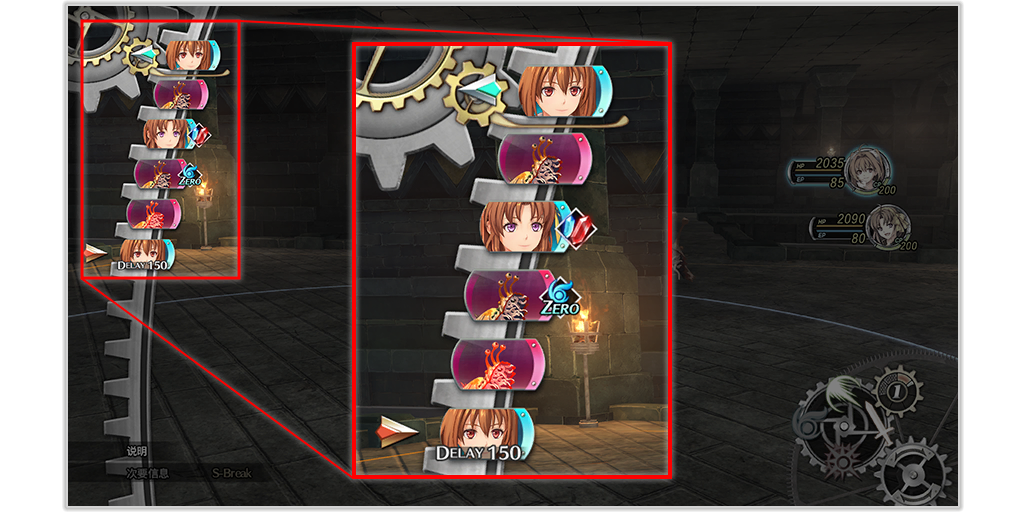
Combat progresses by selecting commands for each AT (active turn). Characters with higher SPD (speed) can act more frequently.
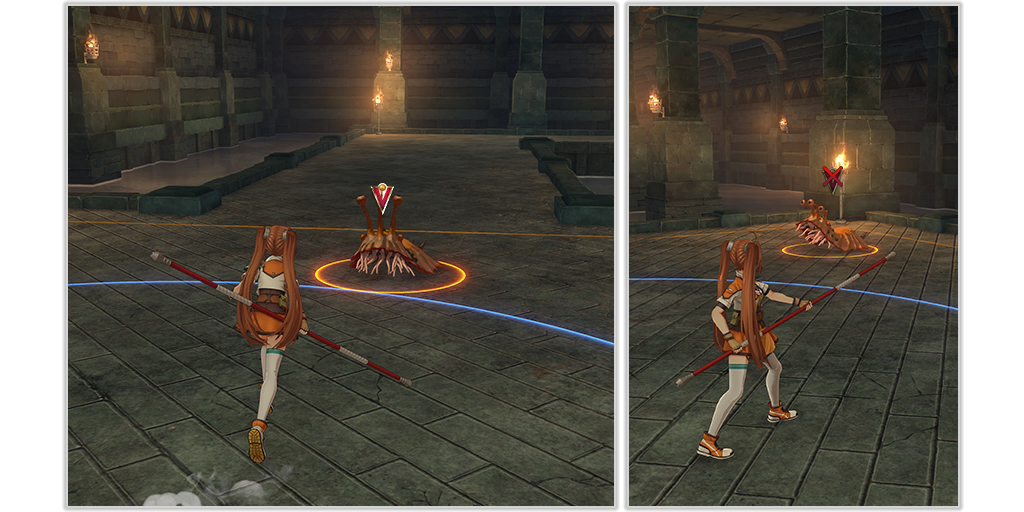
Move within the blue circle using [control button], and perform a normal attack with [control button]. Enemies outside the blue circle cannot be attacked.
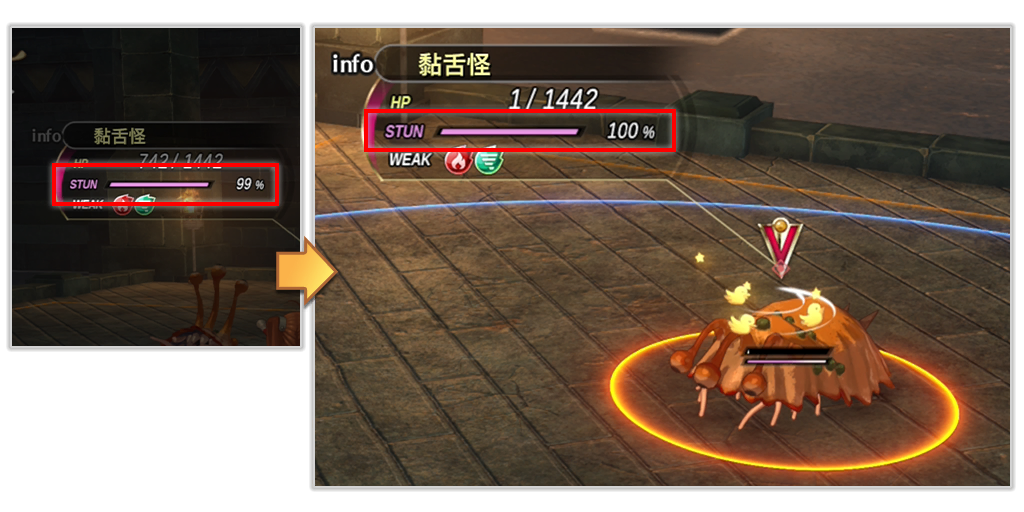
When an enemy's Stun Gauge reaches 100%, they become stunned! This prevents the enemy from acting once and increases damage dealt.
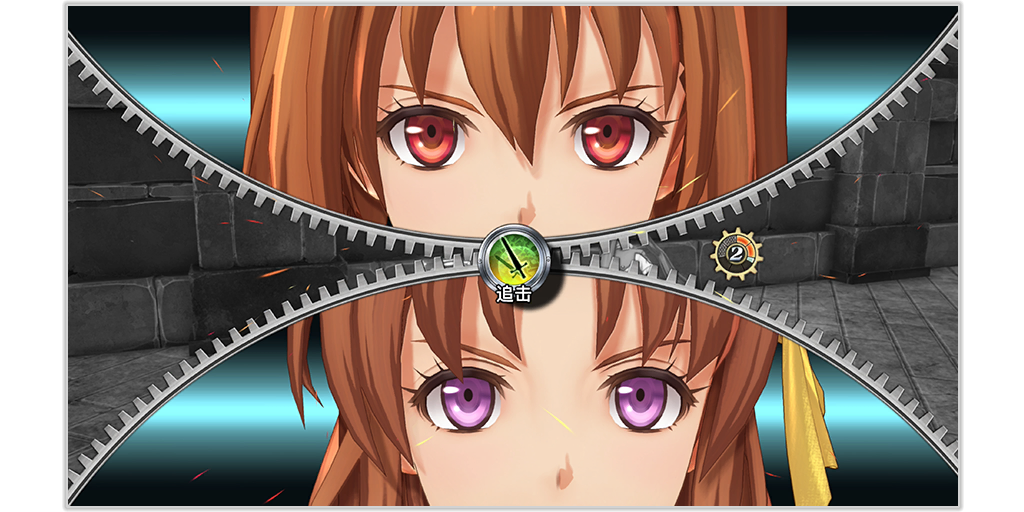
Stunning an enemy or attacking them while they're stunned triggers a Brave Attack! Pressing [control button] allows you to perform a Follow-Up.
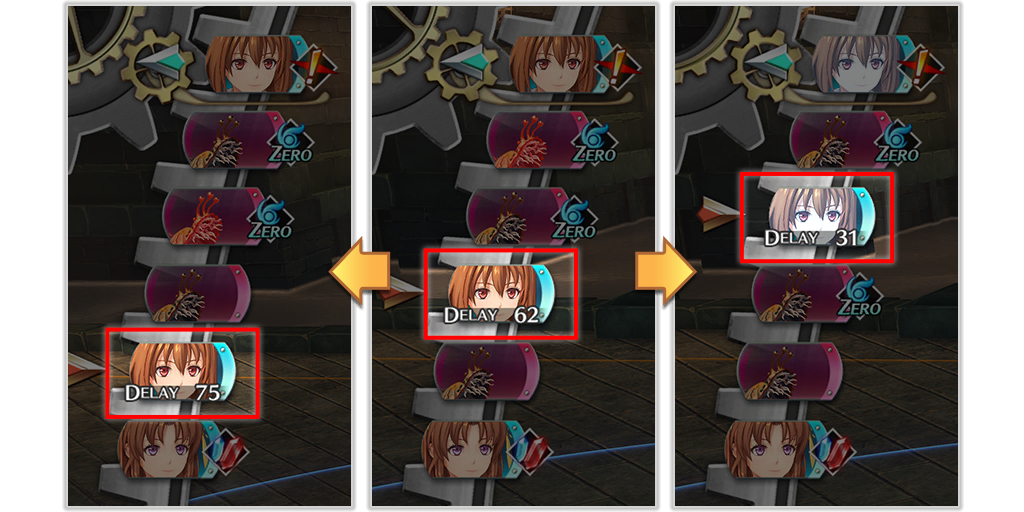
All actions have a delay (recovery time) that's incurred after they're performed. Powerful crafts and arts have longer delays, while defense, item use, and support crafts have shorter delays.
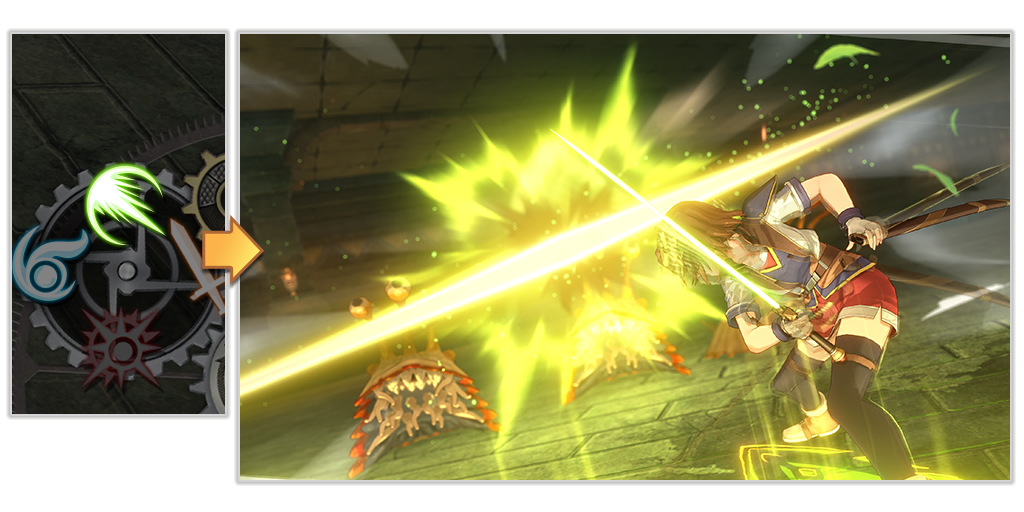
Use crafts with [control button]. CP increases when attacking or taking damage, and you can spend CP to perform crafts (combat skills) with various effects and ranges.
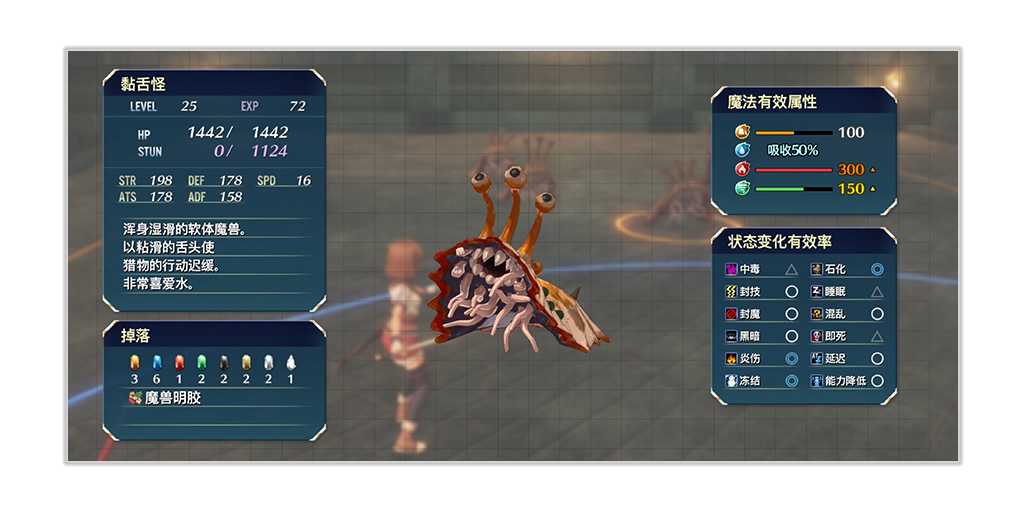
Use [control button] to display enemy details. You can view various stats, elemental weaknesses, and status ailment effectiveness. *Items and supplementary info are revealed upon stunning or defeating the enemy.
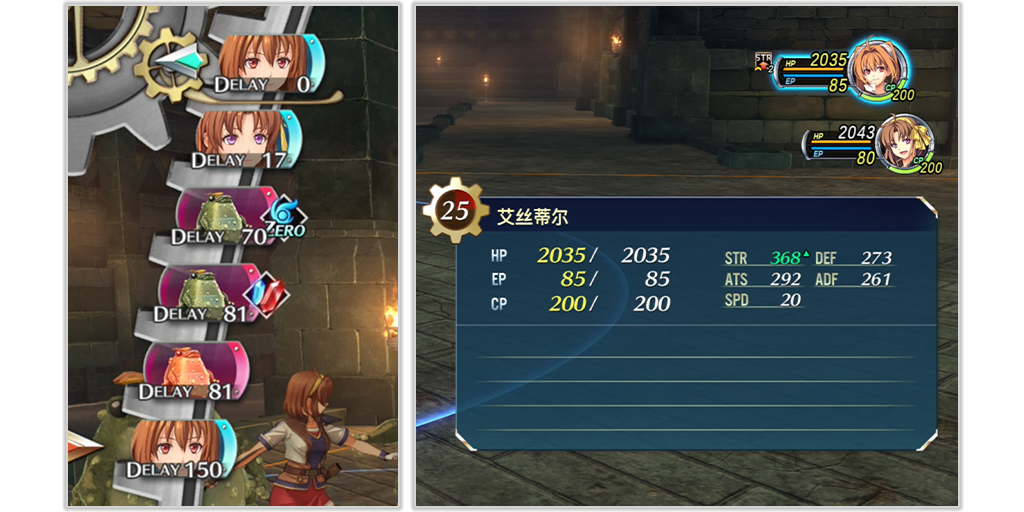
Use [control button] to access sub information. You can check your character's stats as well as delay (recovery time) details.
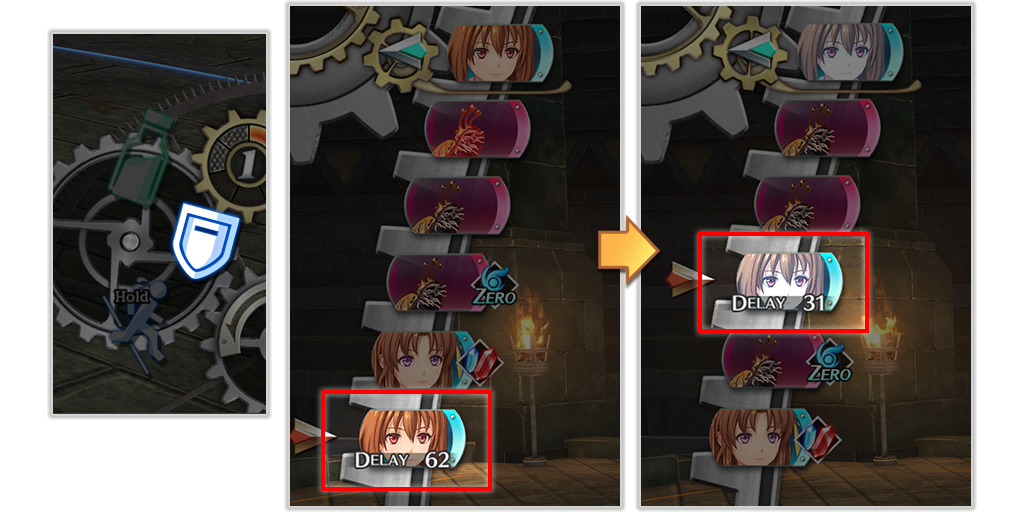
Press [control button] + [control button] to guard against attacks. Guarding reduces incoming damage by half. The character's Delay (recovery time) is also reduced by half, allowing you to adjust turn order strategically.
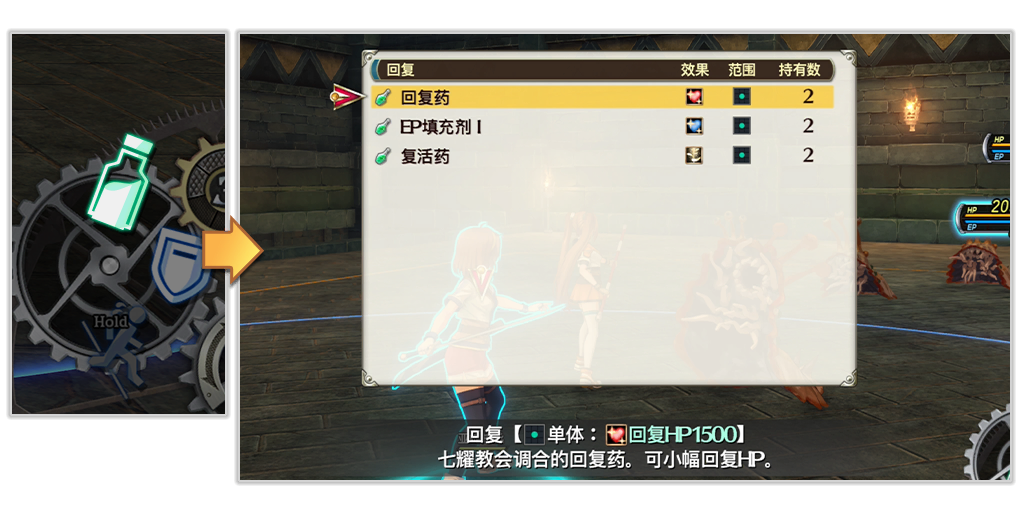
Use [control button] + [control button] to use items. You can use items with various effects. Delay (recovery time) is half that of a normal attack, enabling quick actions.
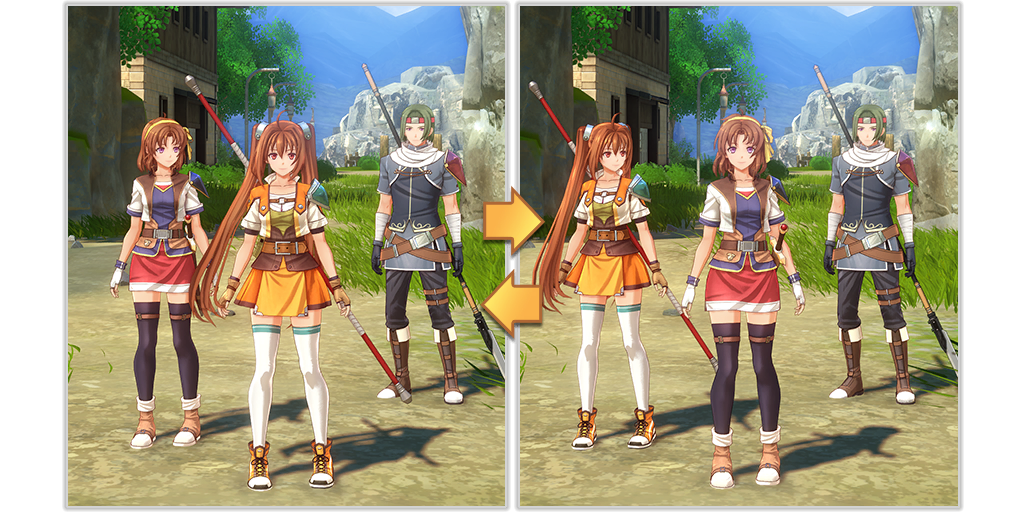
Switch leaders by pressing [control button].
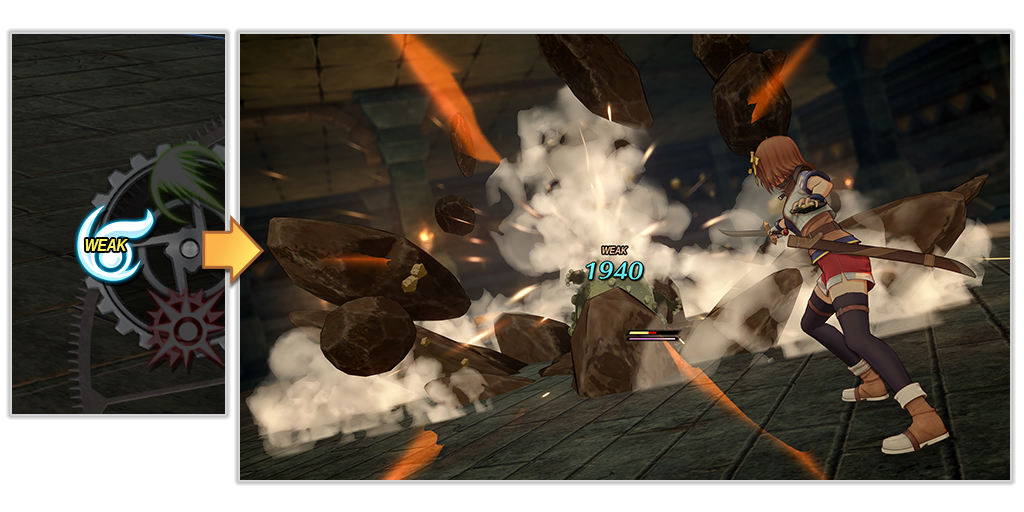
Use arts with [control button]. Consume EP to cast various arts (orbal arts). Arts require casting time before activation but are extremely powerful.
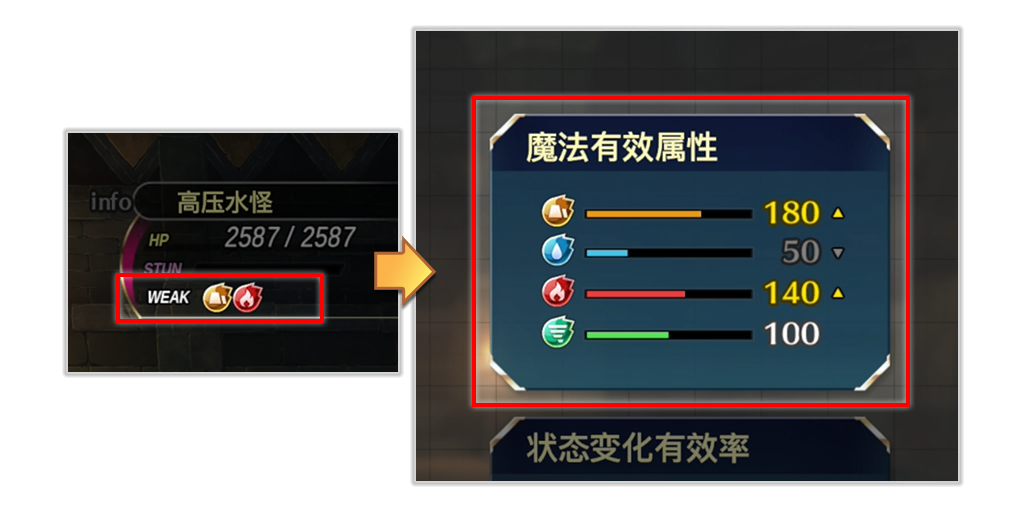
Effectively using Earth, Water, Fire, and Wind arts allows you to exploit weaknesses for massive damage. Time, Space, and Mirage arts cannot exploit weaknesses, but deal stable damage.
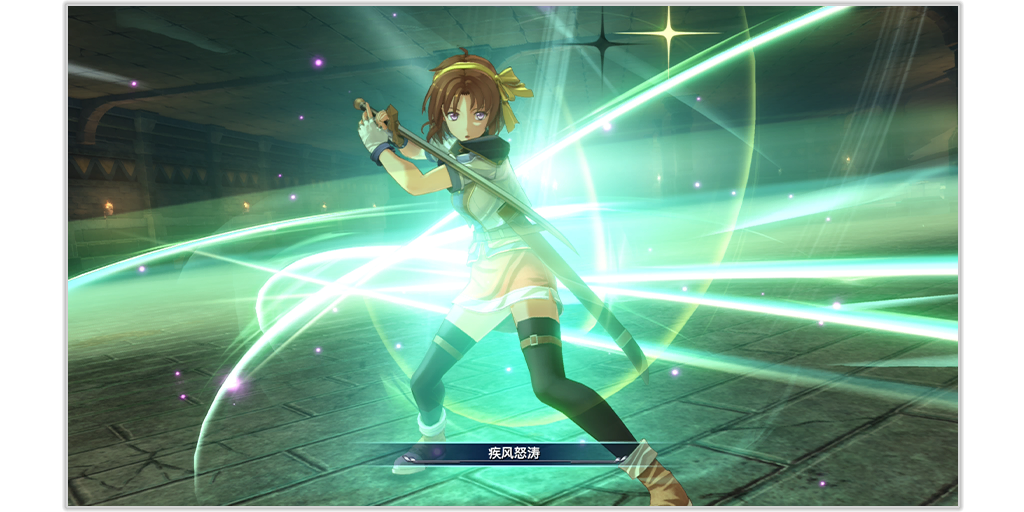
During Command Battles, various support actions activate under specific conditions.
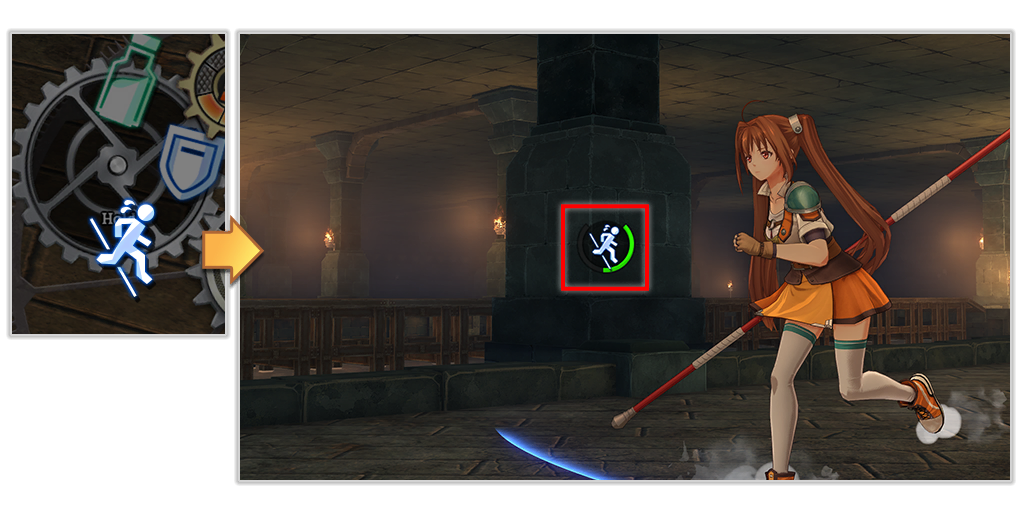
Use [control button] + [control button] to retreat and return to Quick Battle at any time. *If the enemy has the advantage, you will be unable to retreat until a total of 5 actions have been taken by allies and enemies.
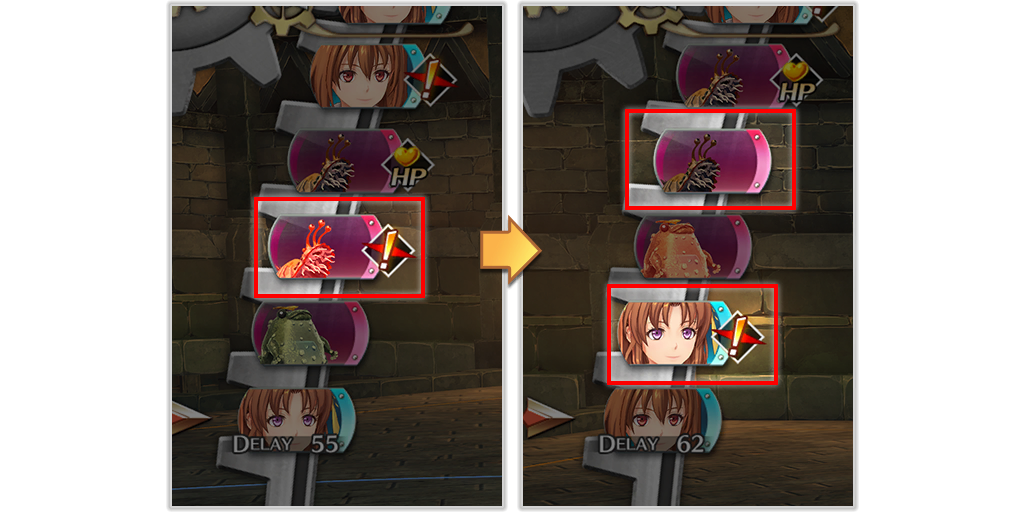
You can steal AT Bonuses by stunning or defeating enemies, or through Brave Attacks. You can also steal them by causing [game symbol]Delay or using certain crafts.
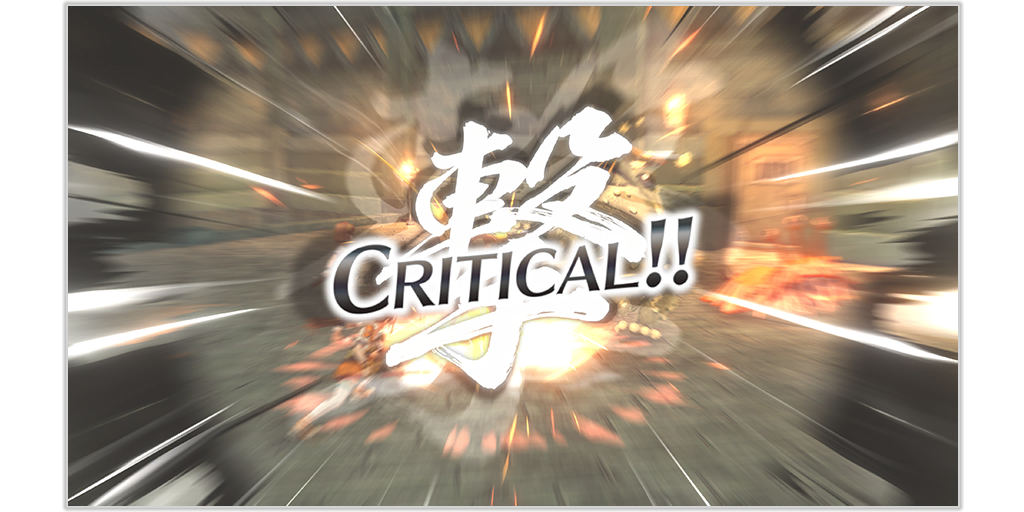
When you land a critical hit, you will always trigger a Brave Attack regardless of the enemy's current state.
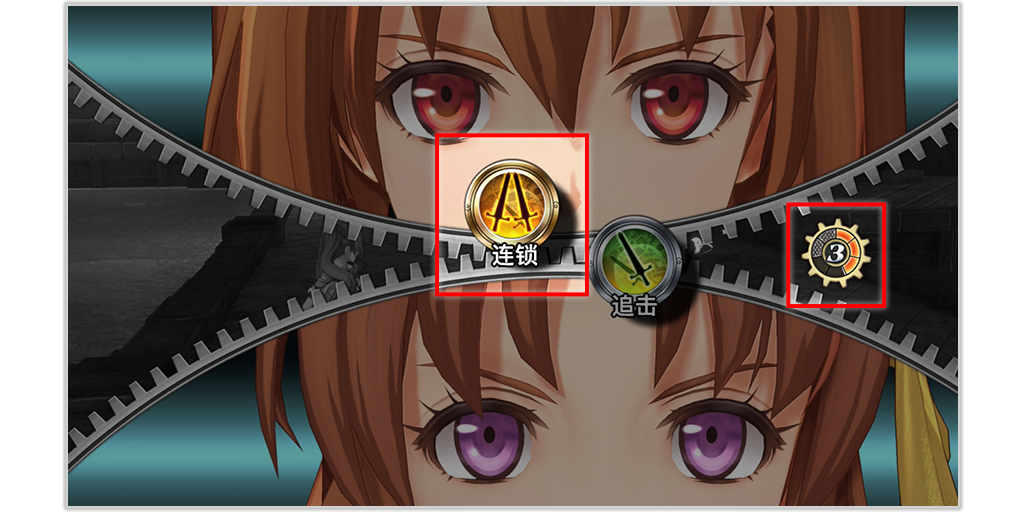
After triggering a Brave Attack, press [control button] to activate a Chain! By consuming 3 Brave Gauge points, unleash a coordinated attack between two characters. The two characters will gain a lot of CP as well, so do your best to pull this off!
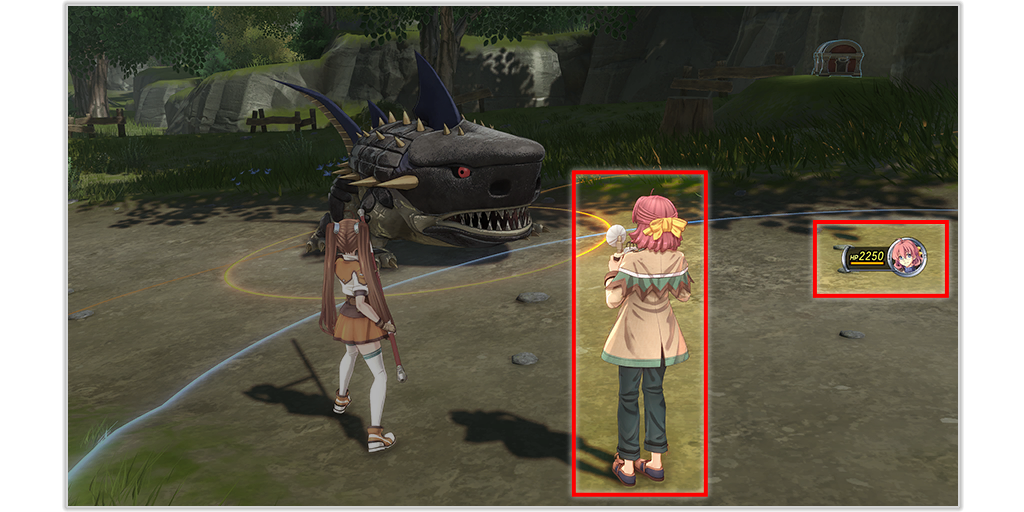
In Escort Battles, you must protect the escort target. The battle itself doesn't impact your BP, but if the target is incapacitated, it's an immediate game over. Proceed with caution!
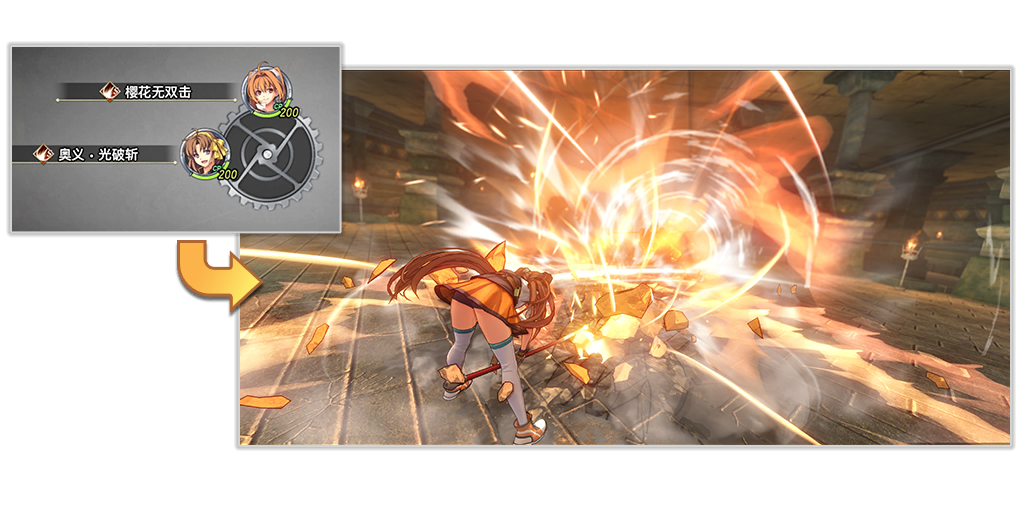
Select with [control button] + [control button][control button][control button][control button] to perform an S-Break! Consumes all CP (at least 100 required) and immediately activates an S-Craft regardless of whose AT (active turn) it is.
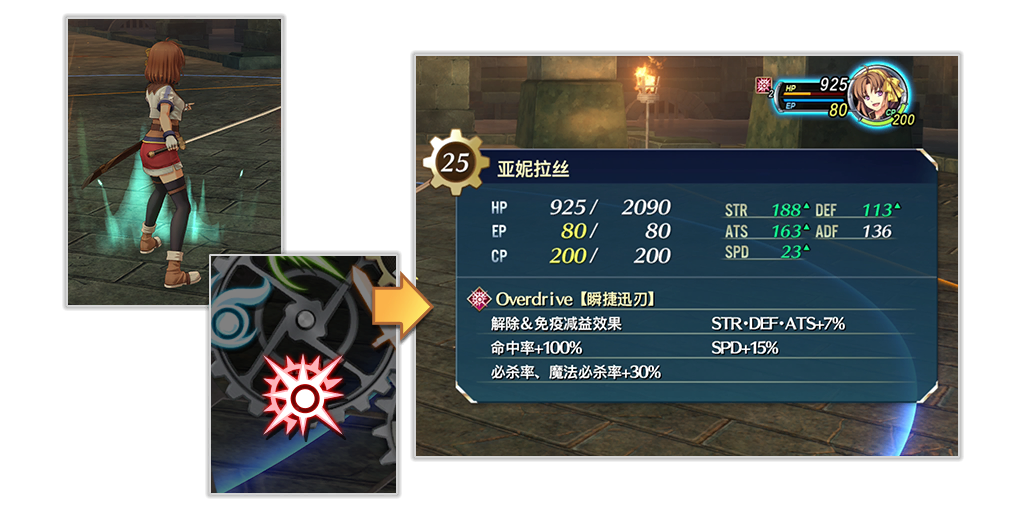
Hold [control button] to activate Overdrive! Overdrive is a function of tactical orbments usable when a character's aura appears. Grants debuff immunity and powerful buffs for two turns.
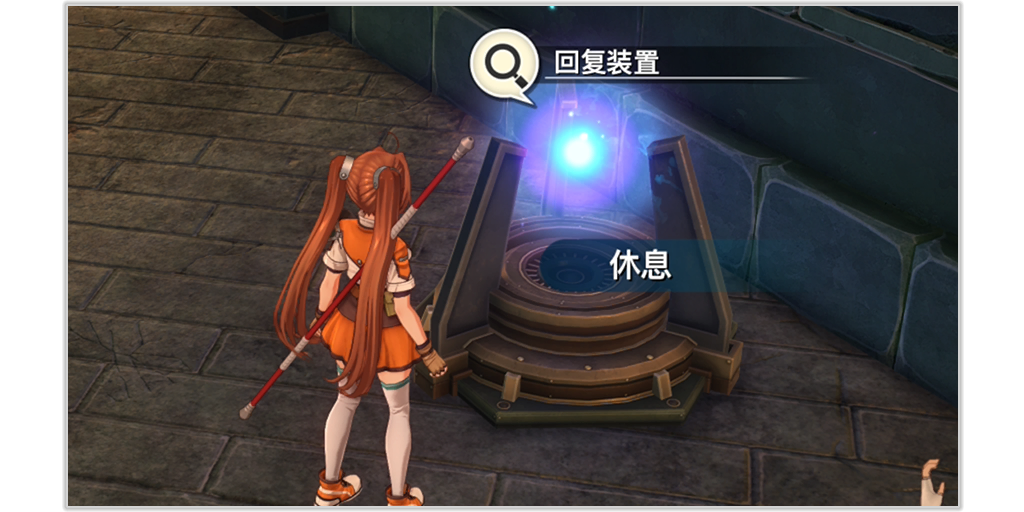
Healing Devices can fully restore your HP and EP.
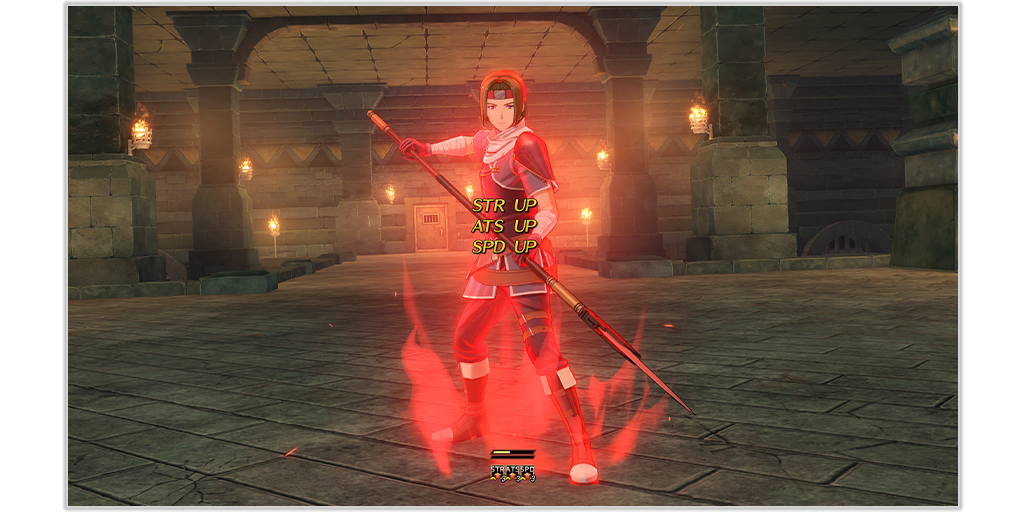
Some powerful enemies can enter a [game symbol]Rage Boost state. In this state, they gain unavoidable attacks, reduced delay, and buffs to various stats. They can even steal AT Bonuses, so stay alert!
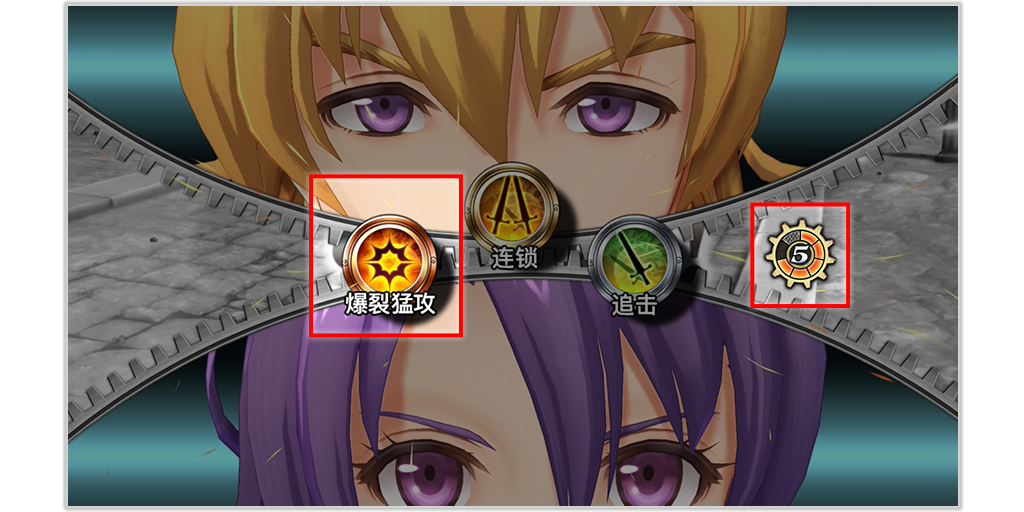
After a Brave Attack, press [control button] to activate a Burst! Consume 5 Brave Gauge points to remove all debuffs and unleash an all-out attack with the entire party.
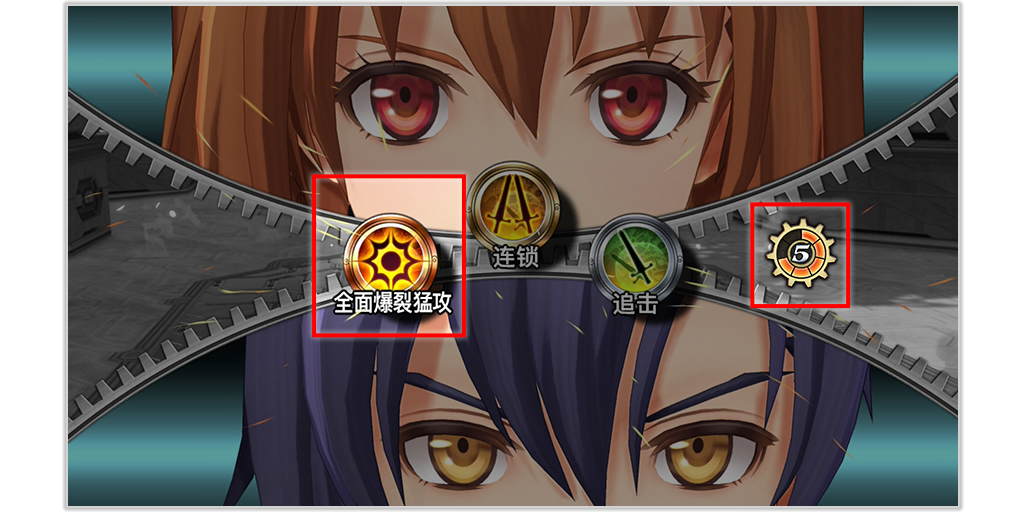
After a Brave Attack, press [control button] to activate a Full Burst! Consume 5 Brave Gauge points to remove all debuffs and unleash a coordinated all-out attack culminating in a joint strike by Estelle and Joshua.
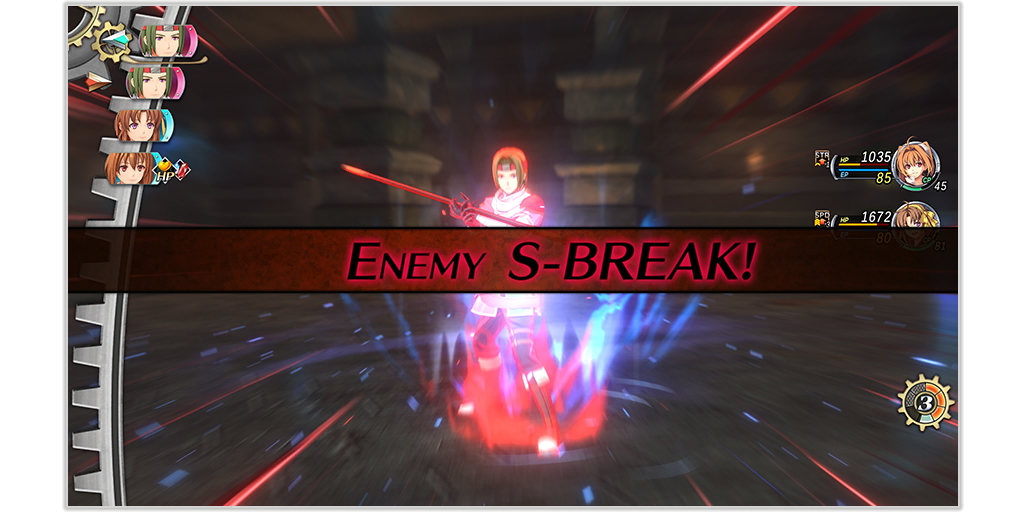
Certain enemies will activate S-Breaks during their Rage Boost to unleash powerful special moves regardless of AT (turn order). They may even strike multiple times in a row, so even a single moment of carelessness could prove fatal!
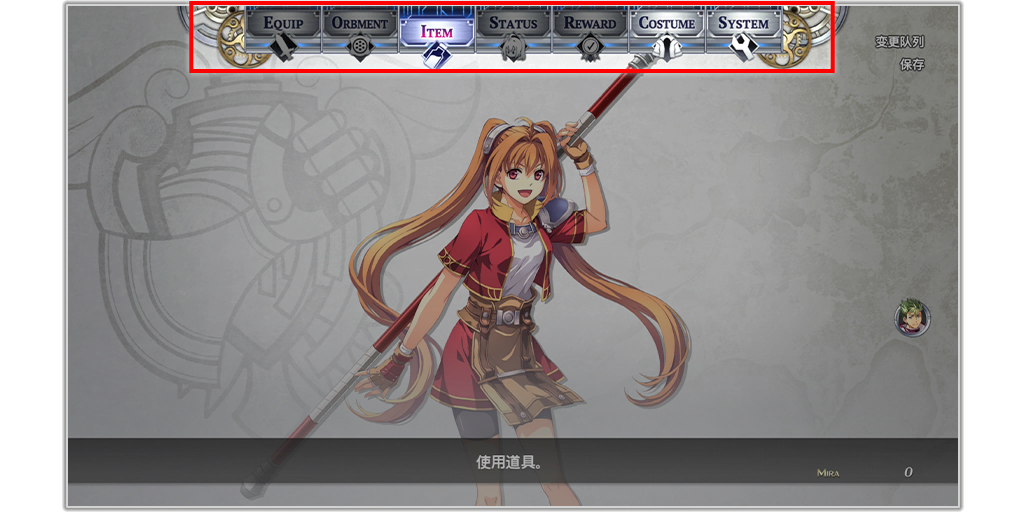
In the Main Menu, you can change equipment, use items, and view character statuses.
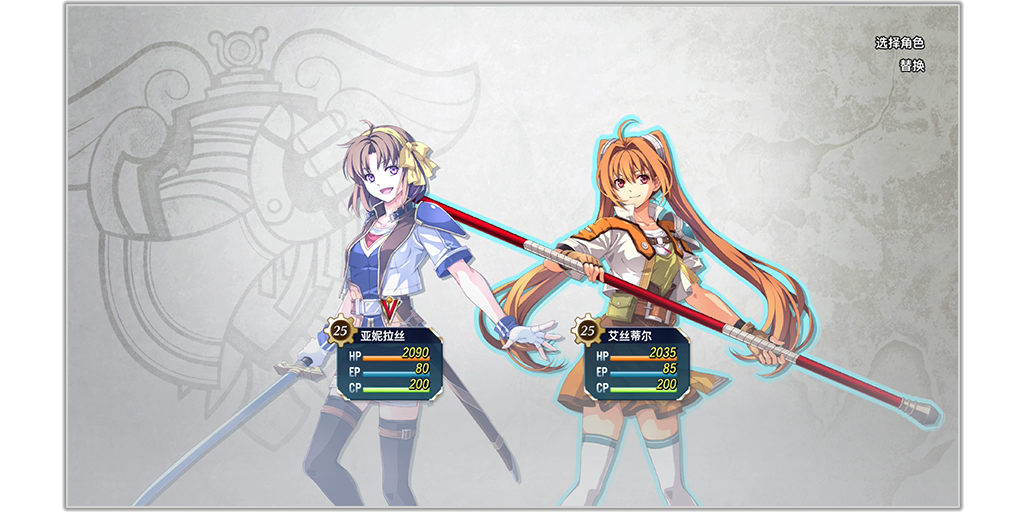
Press [control button] in the Main Menu to rearrange the order of your party members.
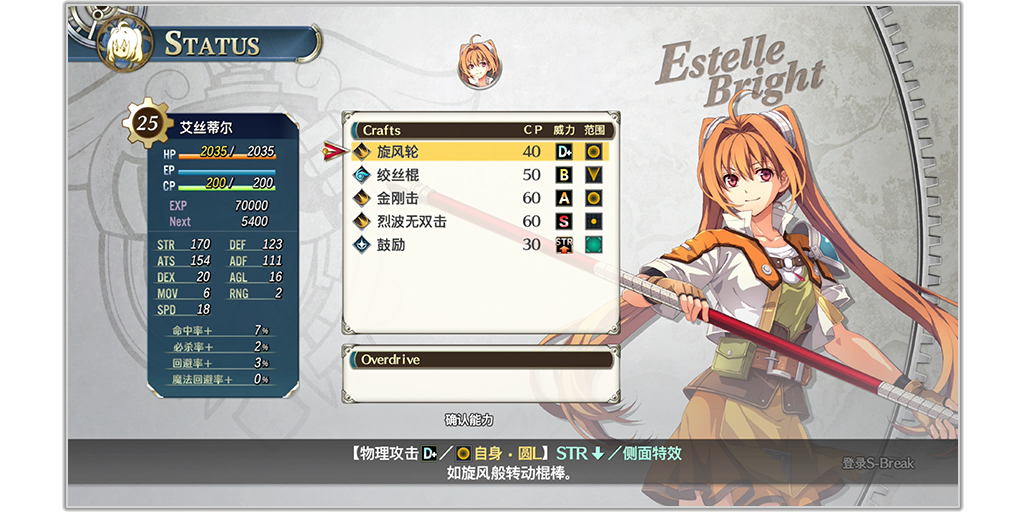
On the Status screen, you can view characters' parameters, crafts, Overdrive capabilities, and Support Abilities.
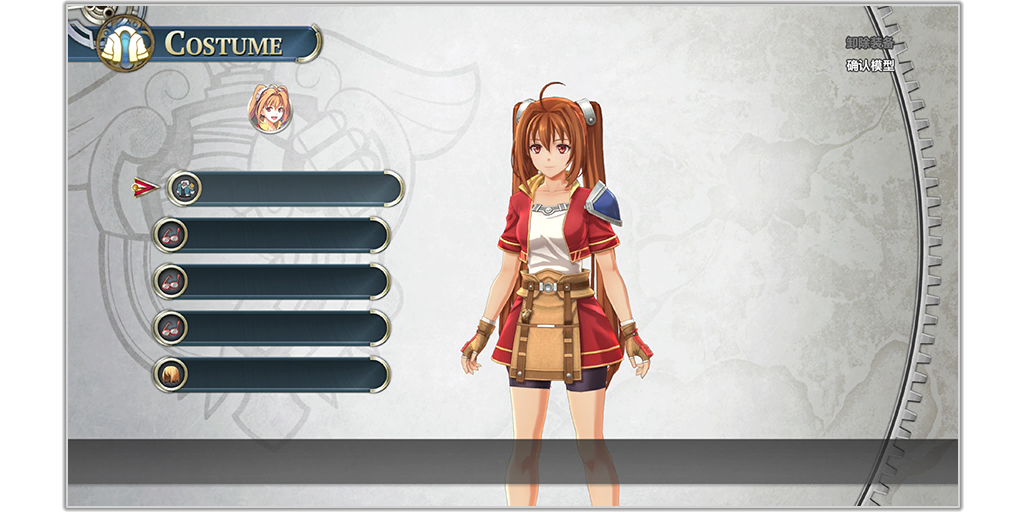
On the Costume screen, you can change your allies' outfits, hair colors, and accessories. *You can also disable their appearance during events in the Options Menu.
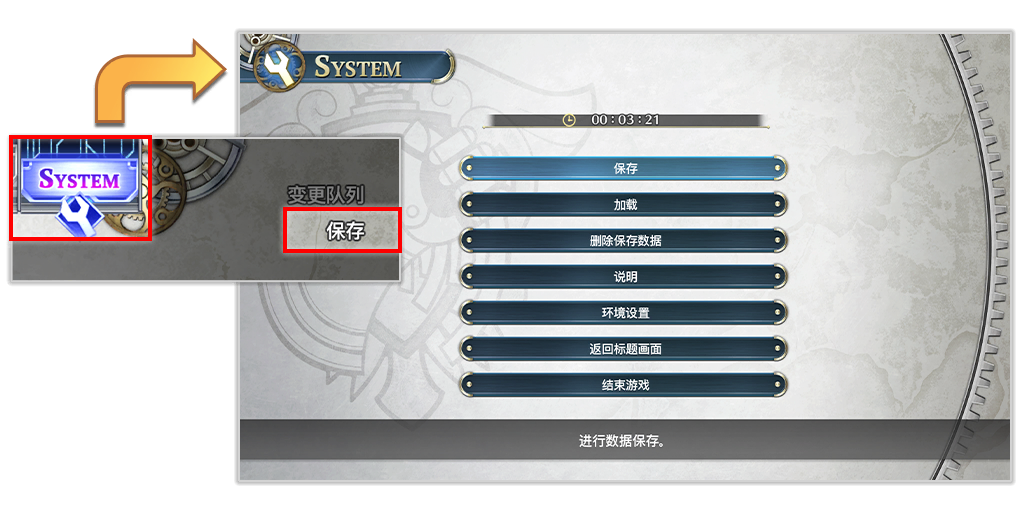
Press [control button] in the Main Menu to save your game. You can also load data and adjust settings in the System Menu.
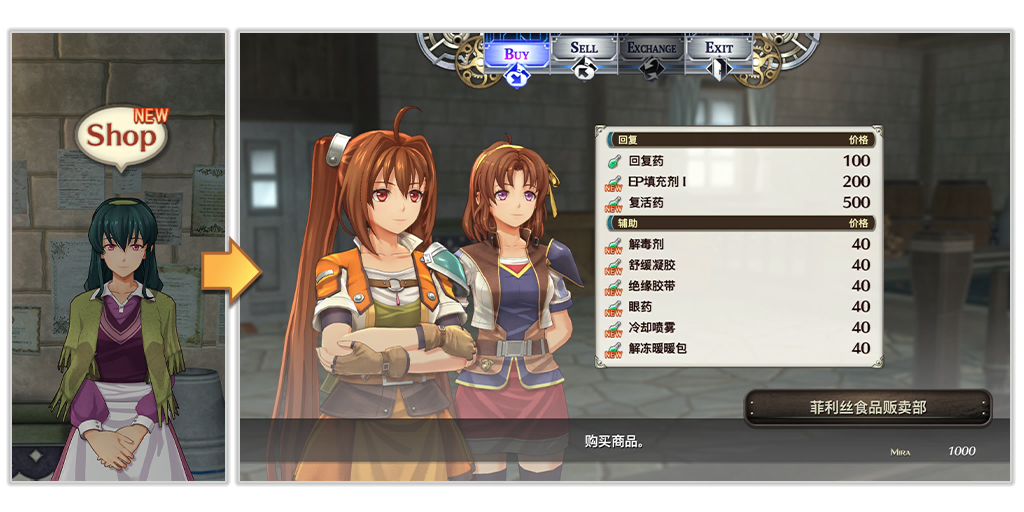
Shops with undiscovered items are marked with [game symbol]. Once all items have been discovered, the map icon changes from [game symbol] to [game symbol].
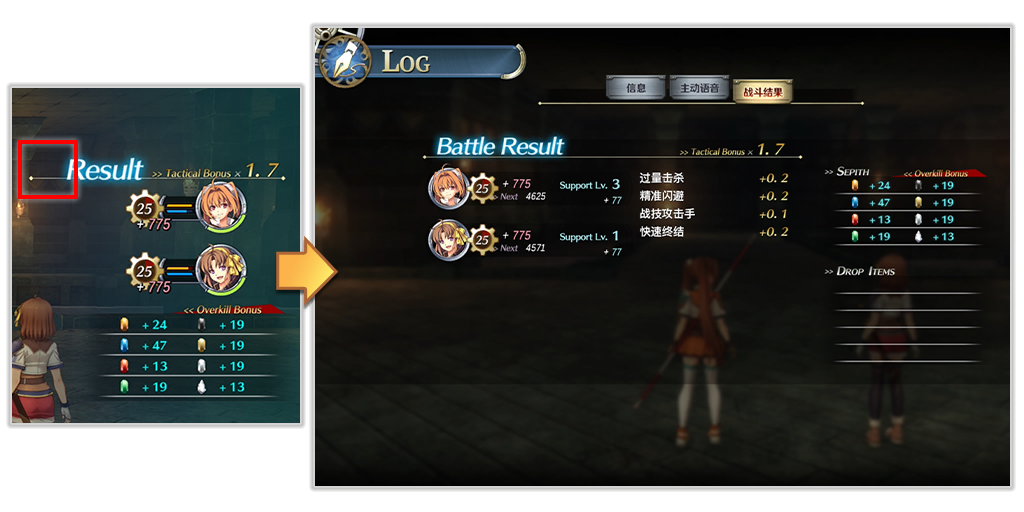
You can review the experience points, sepith, and items you've obtained. Press [control button] for detailed view. You can also check your most recent results through the log menu.
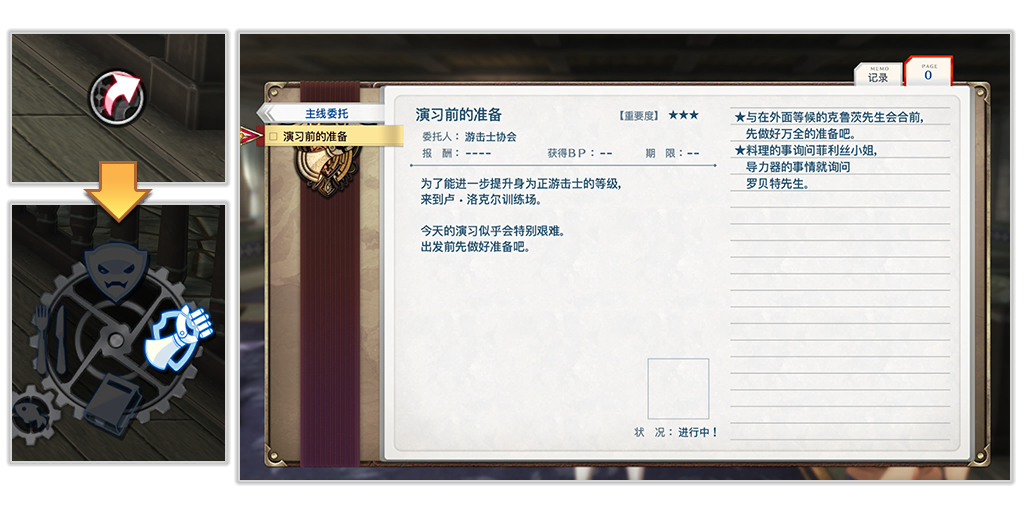
Press [control button]+[control button] to open the Bracer Notebook. It automatically records details of requests found on the bulletin board and significant story events.
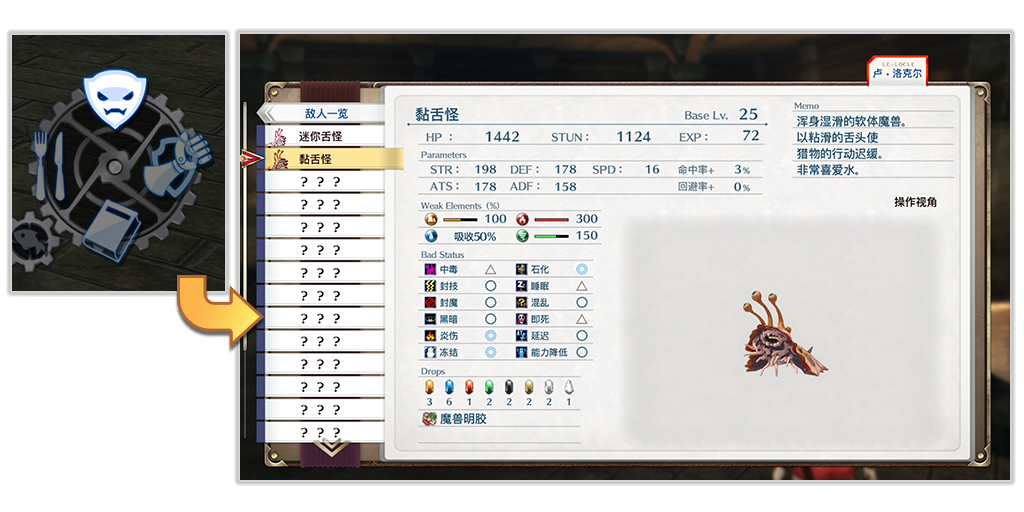
Press [control button]+[control button] to open the Combat Handbook. Enemy details are automatically recorded into the handbook when they are defeated or stunned.
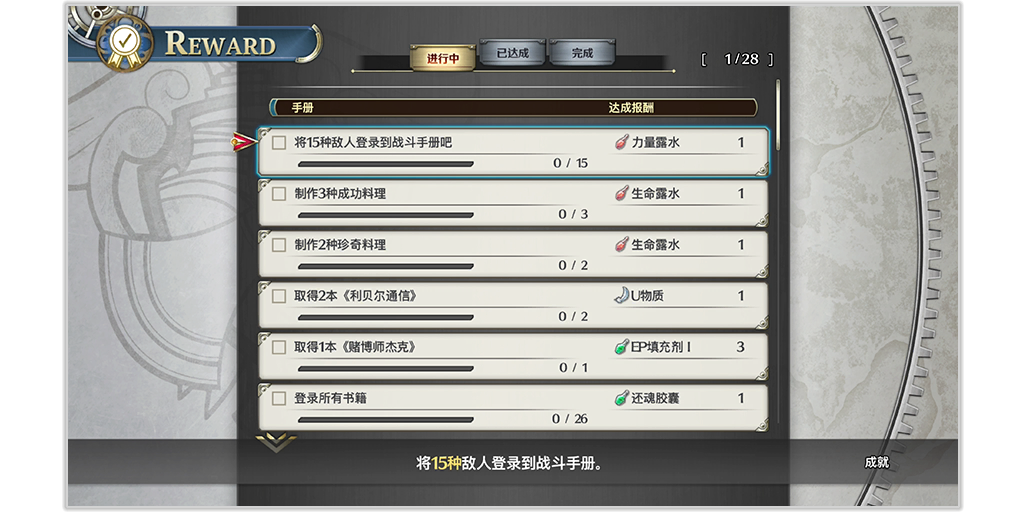
On the Reward screen, you can track your progress for various achievements. Reaching certain milestones will grant you special reward items.
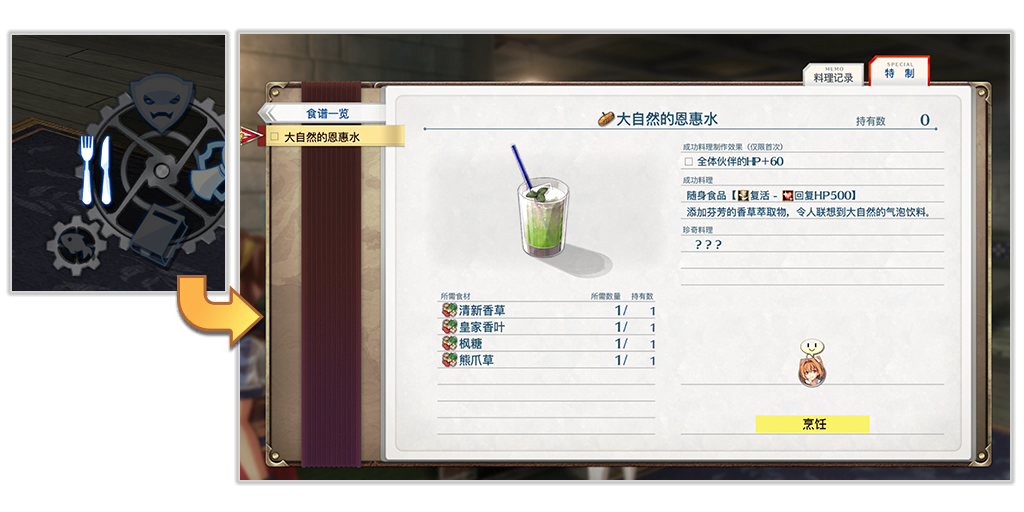
Press [control button]+[control button] to open the Recipe Book. It lists dishes you've tasted and allows you to cook them using gathered ingredients.
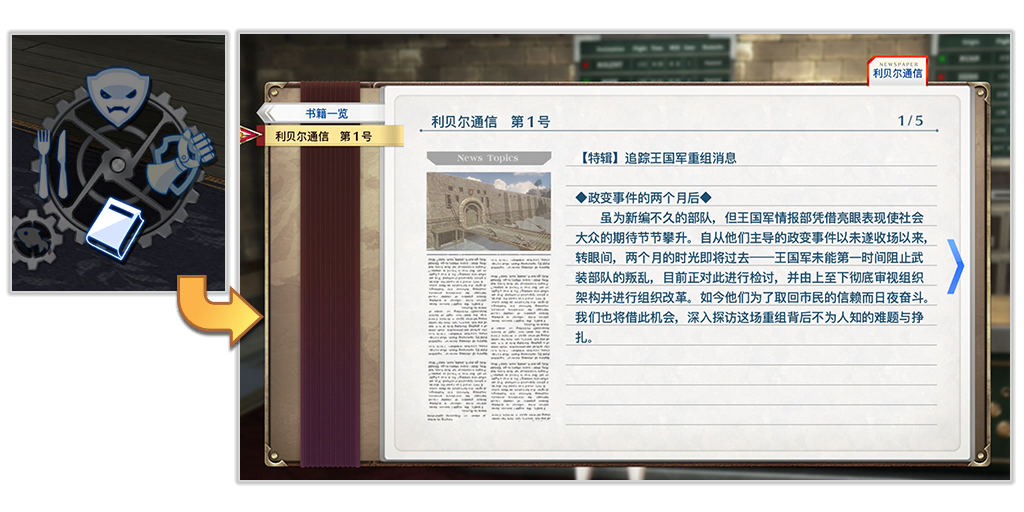
Press [control button]+[control button] to read collected books. Publications like 'The Liberl News' are automatically recorded once obtained, allowing you to read them anytime.
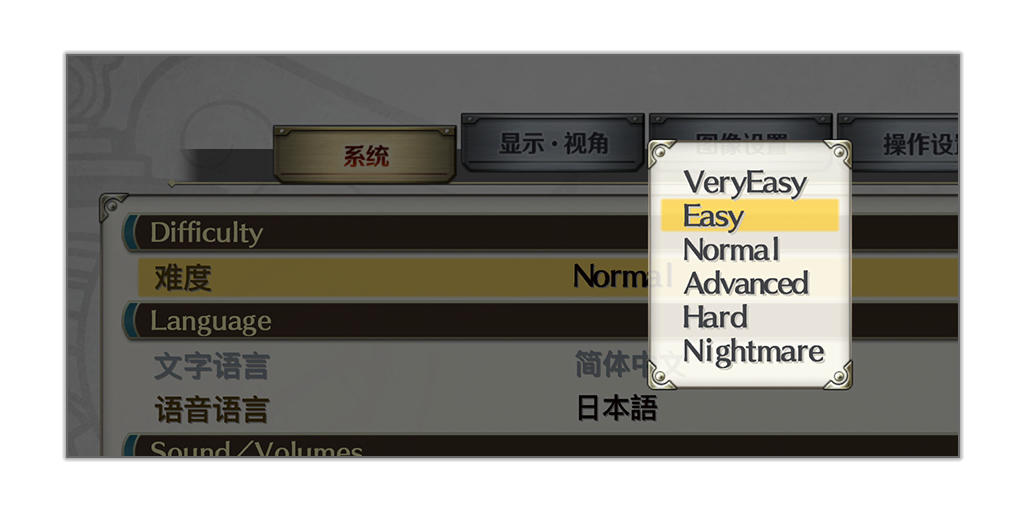
You can adjust battle difficulty in the Options Menu. Difficulty affects both Quick Battles and Command Battles.
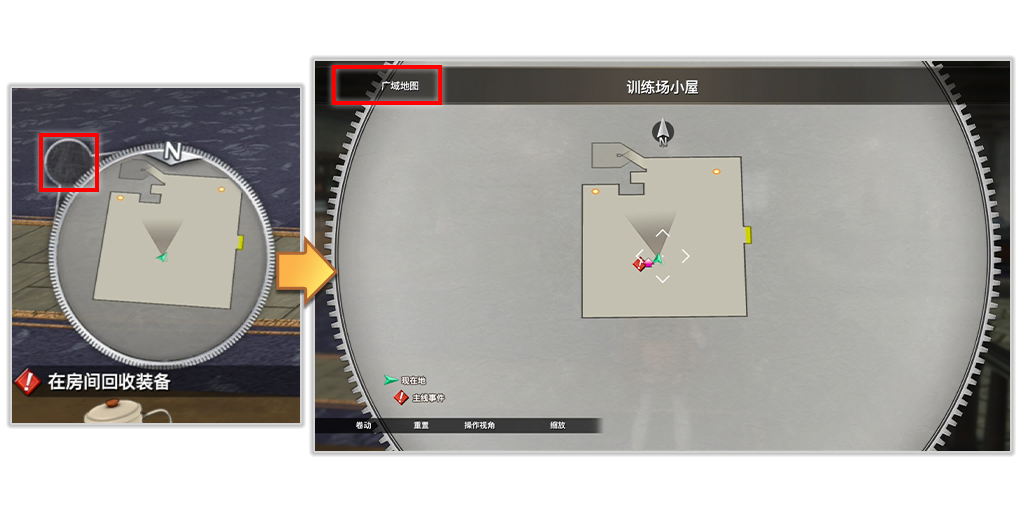
Press [control button] to open the Map Menu. Here, you can view an enlarged map or open the full map of Liberl by pressing [control button].

Spherical crystals refined from sepith dropped by monsters. When installed into tactical orbments, they enhance the user's abilities or allow the use of various orbal magic (arts).
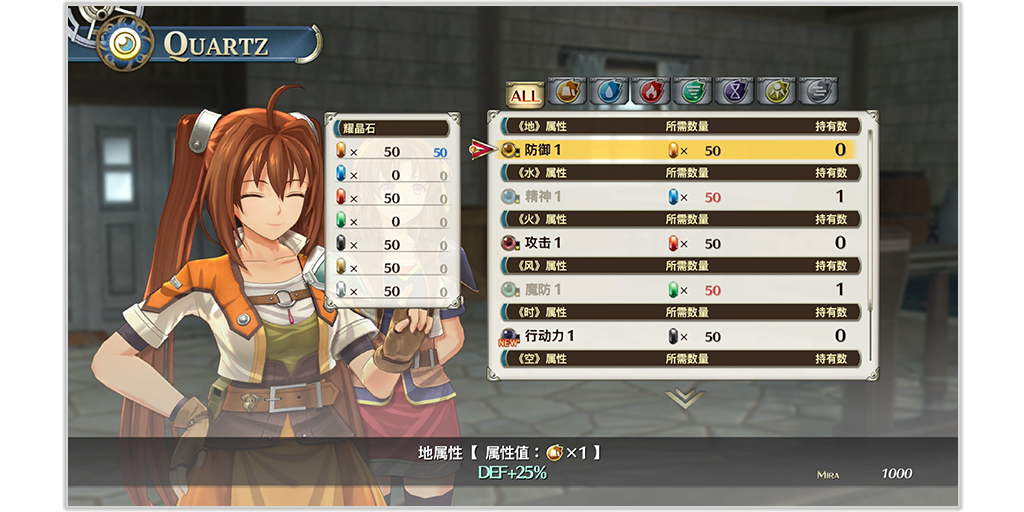
At orbal factories, you can synthesize quartz by using sepith. Each quartz has its own effect and the required sepith for synthesis varies accordingly.
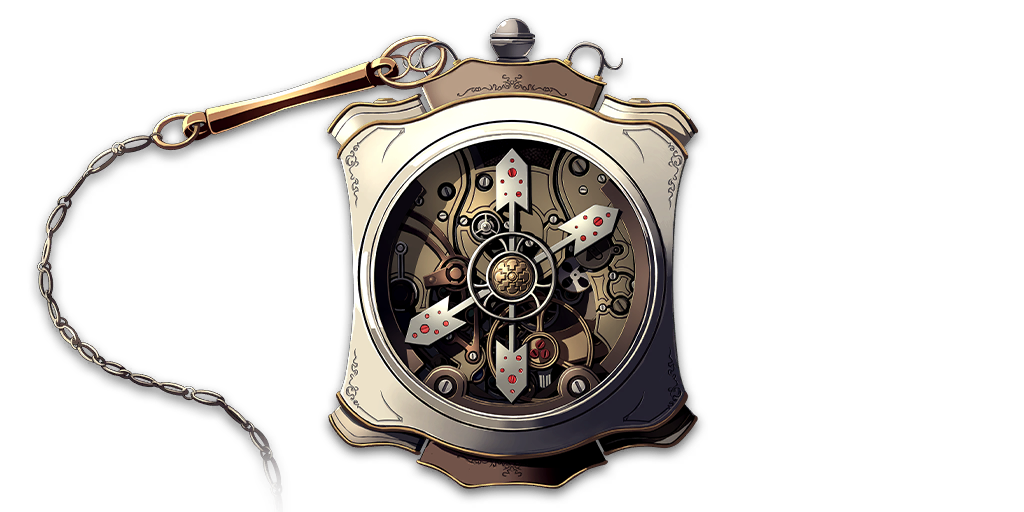
Orbments are devices that draw orbal energy from septium to produce various phenomena. Orbments used for combat are called tactical orbments, and their structures vary by user.
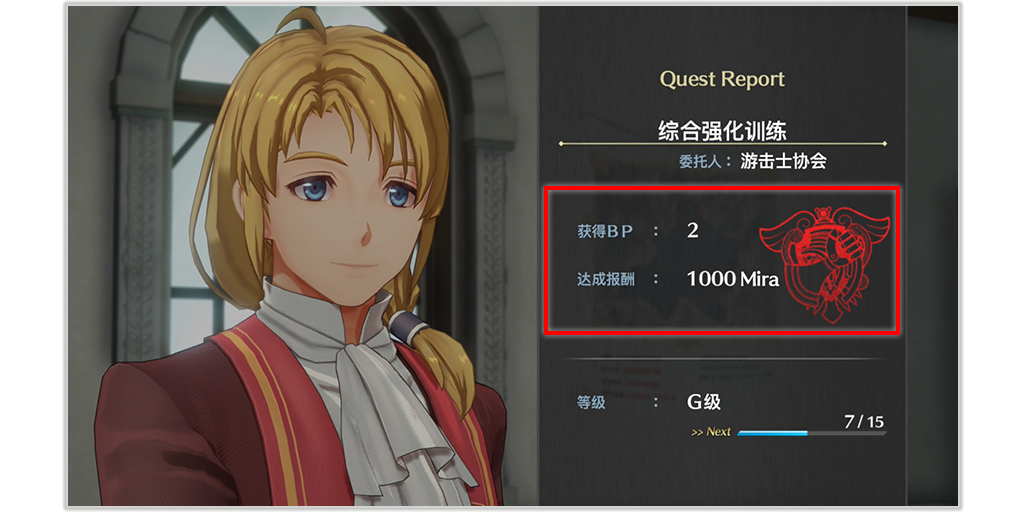
When you complete requests, you'll receive BP (Bracer Points).

Fragments of septium, possessing seven elemental attributes: Earth, Water, Fire, Wind, Time, Space, and Mirage. These represent earth, water, fire, wind, time, space, and perception respectively.
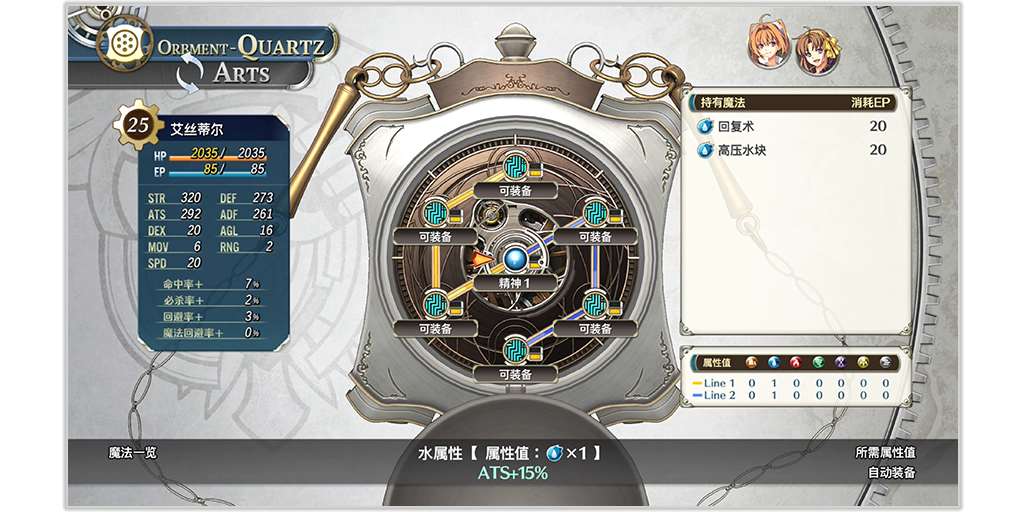
Tactical orbments have engraved lines, and the elemental values of quartz placed on each line are totaled separately. Specific arts become available when elemental values reach certain thresholds.
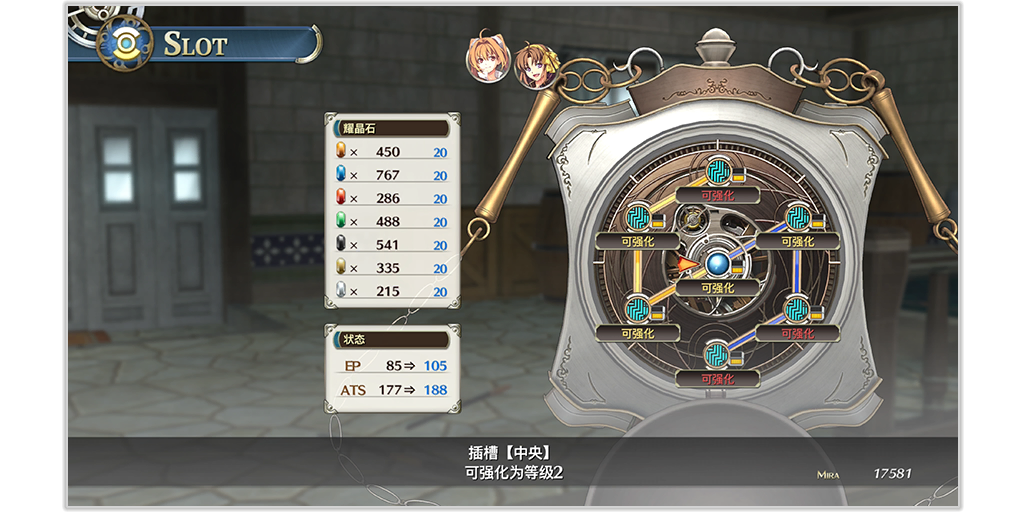
You can upgrade slots by using sepith at orbal factories. Upgrading slots allows you to equip high-grade quartz and increases your maximum EP and ATS (Arts Strength).
Each character's parameters can be viewed on the Status screen.
The more objectives you fulfill, the greater the experience points you'll receive. [Command Battles]
At the start of battle or after actions, various AT Bonuses may randomly occur for allies or enemies.
The above debuffs can be negated with Accessories that have Debuff Immunity. Persistent debuffs can be cured with medicine or healing arts, or by letting turns pass.
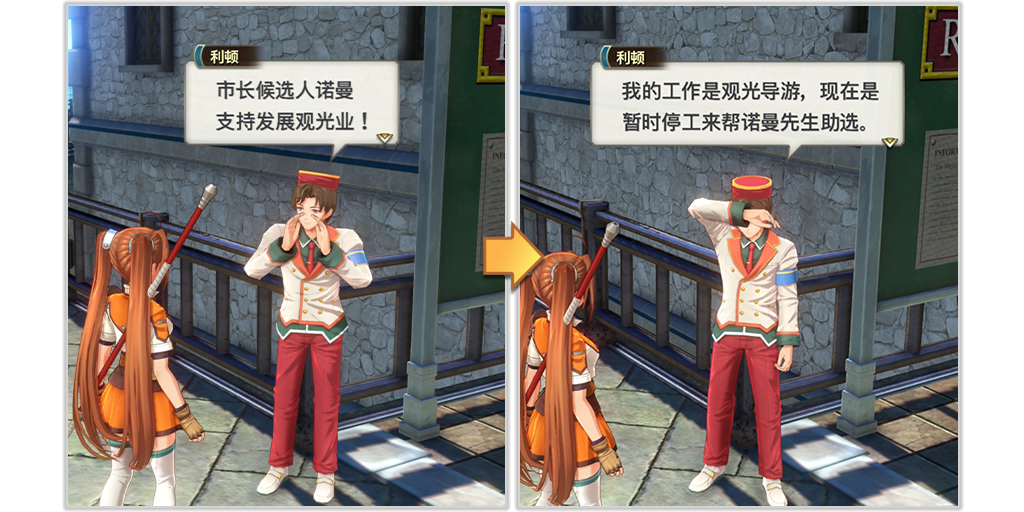
Enjoy conversations with local townspeople. As the story progresses, their dialogue will gradually change.
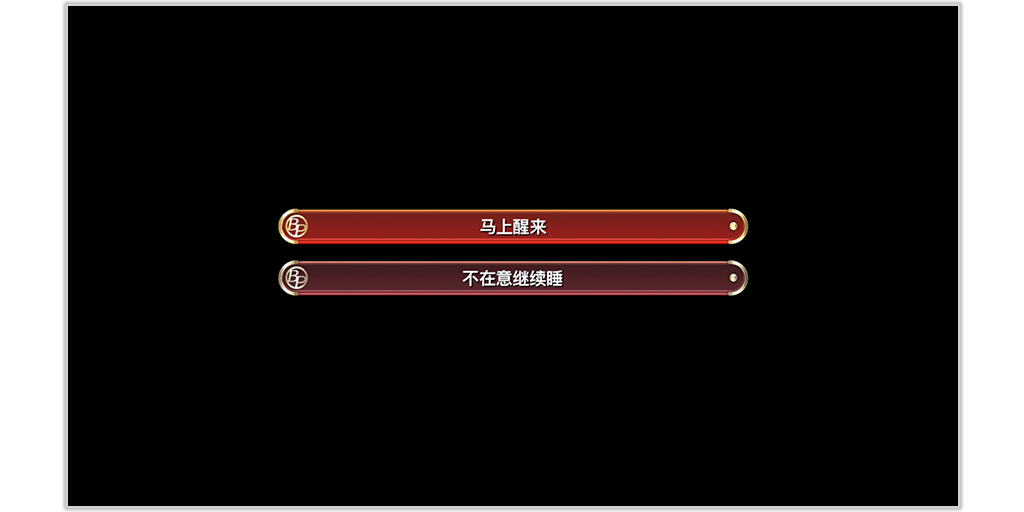
As you progress through the story, special choices may appear. Selecting the correct response will boost your BP.
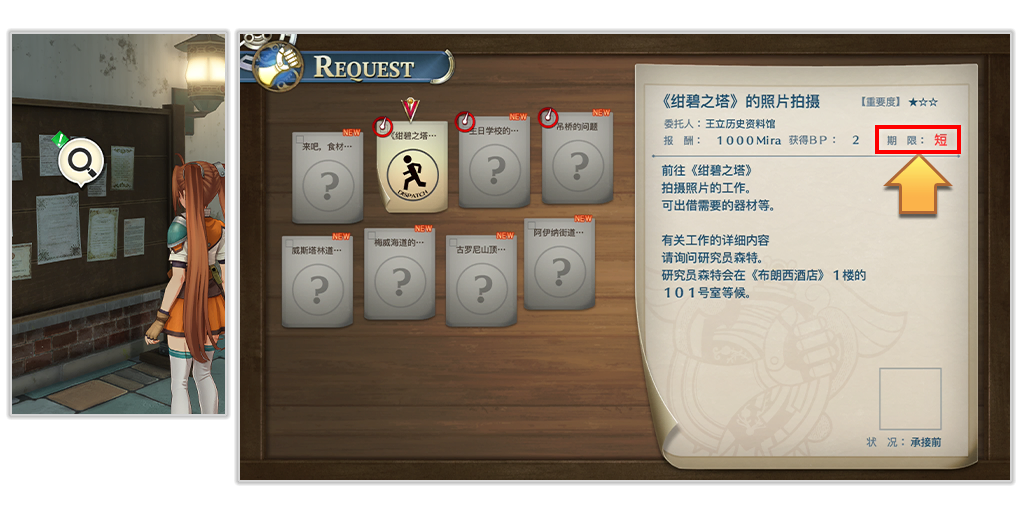
Bulletin boards featuring optional requests and sub-quests are marked with [request marker]. Short-term requests will expire if the story progresses even a little, so don't forget and complete them early!
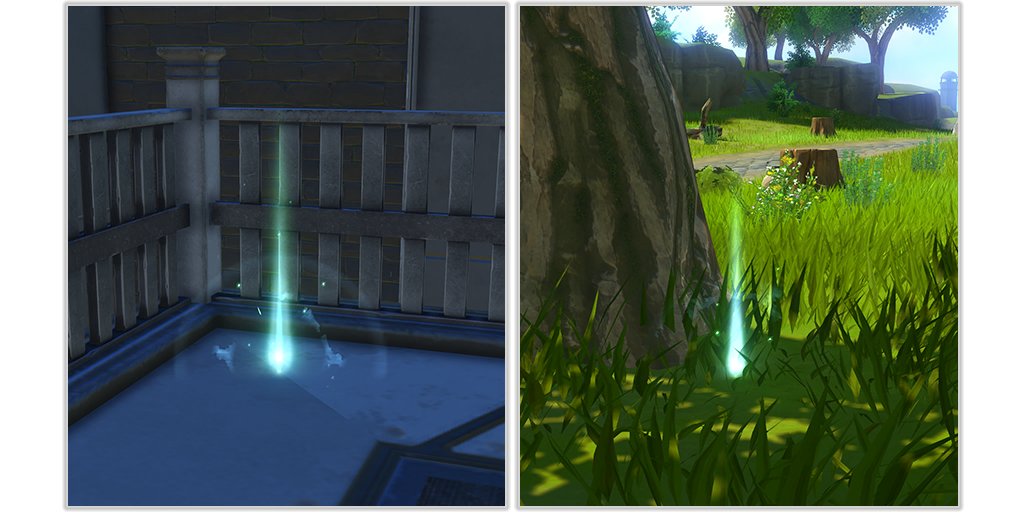
Useful items can sometimes be found along roads or within towns. Explore every corner carefully to collect them!
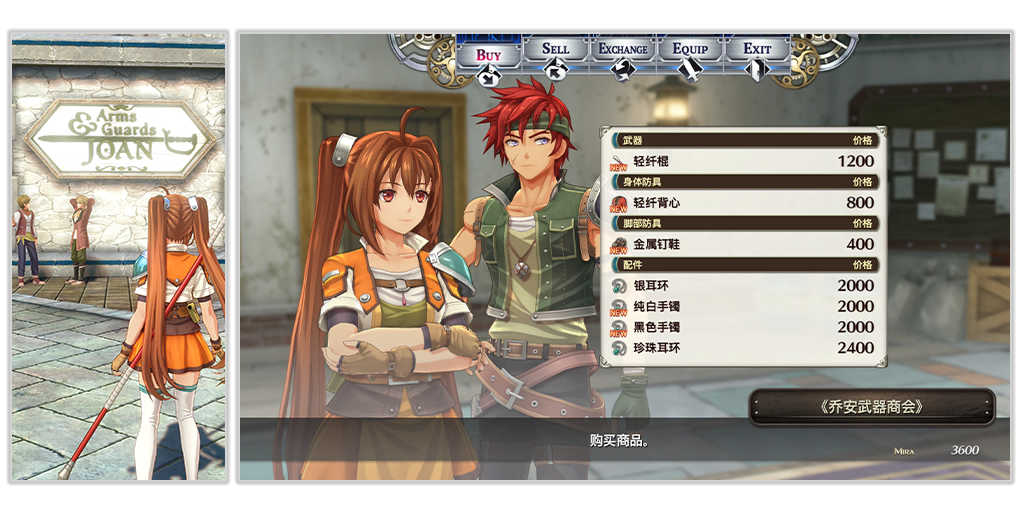
At weapon shops, you can buy weapons, armor, and accessories. Complete requests or exchange sepith masses for mira, and don't forget to equip your new gear!
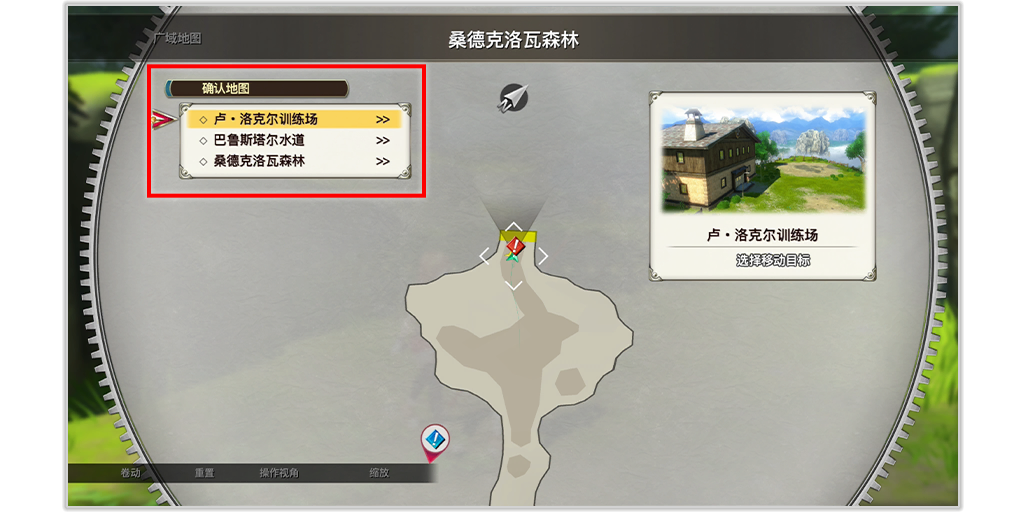
Certain locations you've visited are marked on the map, allowing you to instantly travel to them. You can also view a list of locations by pressing [control button].
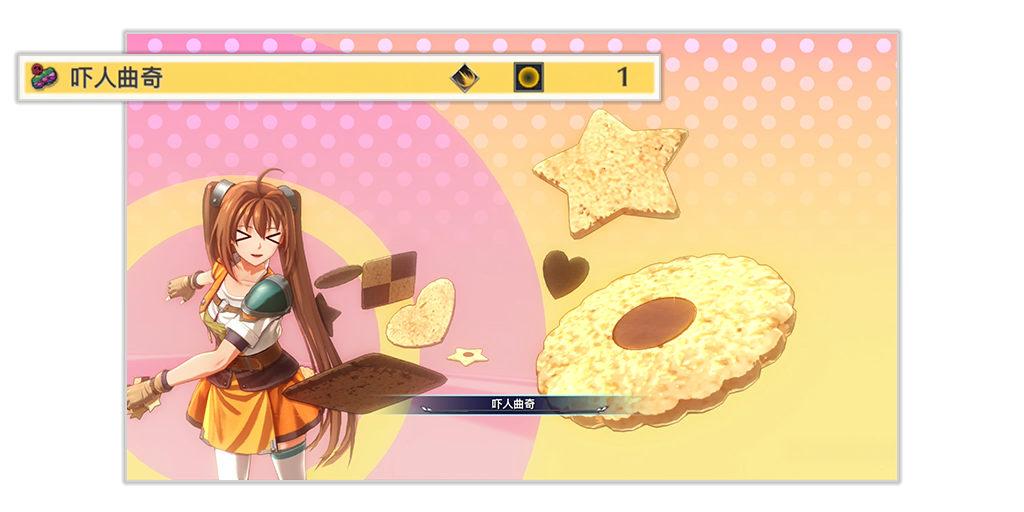
When you fail to create a dish, you can make an [game symbol]Attack Food. These can be used during Command Battles to deal damage to enemies. They're quick to use and consume no CP, so don't let them go to waste!
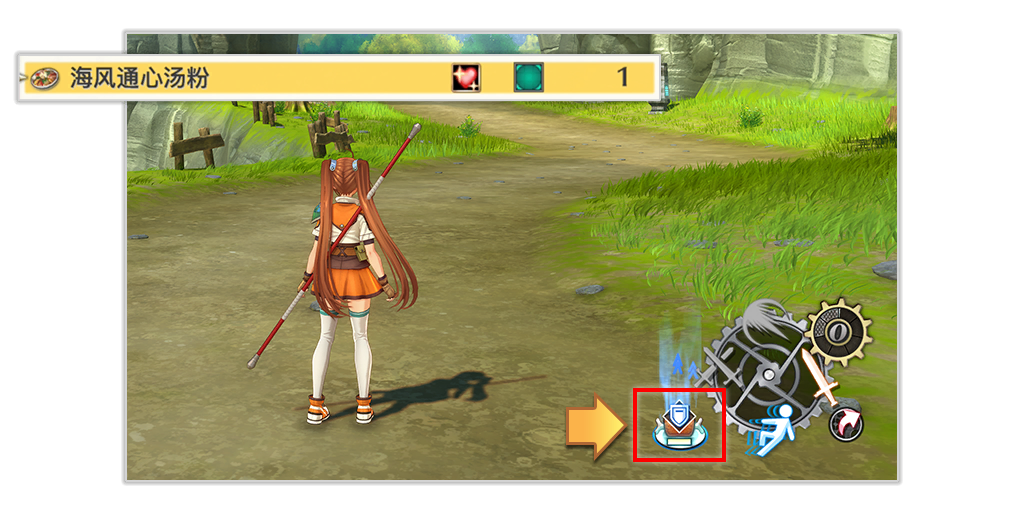
Some foods also grant effects in Quick Battles when used from the Main Menu.
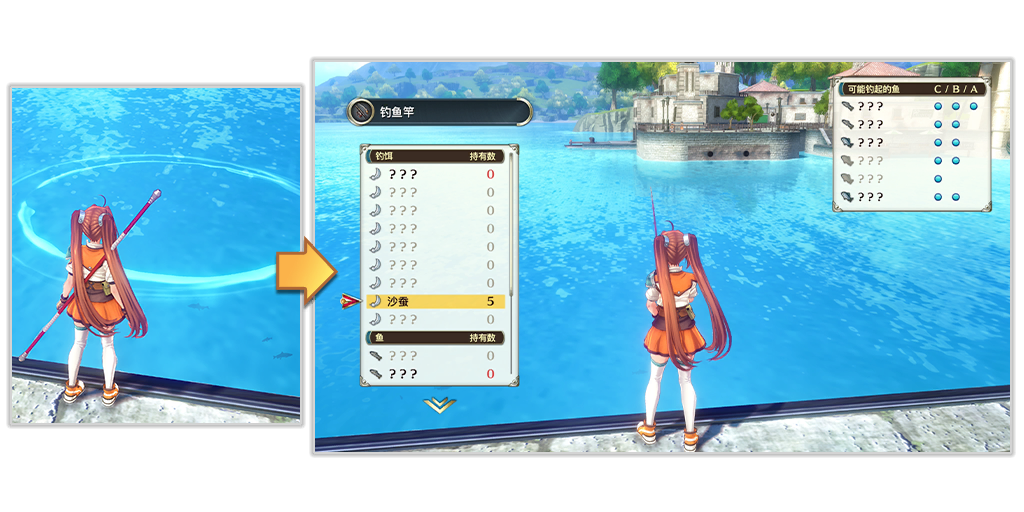
You can fish at designated fishing spots. The fish you can catch varies based on your rod and bait.
Stat increases and decreases can each stack up to three times.
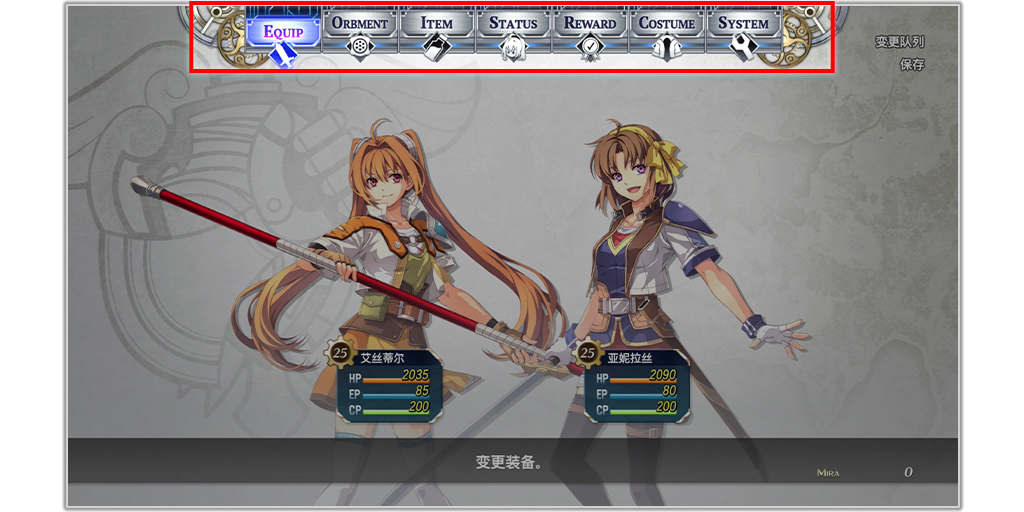
In the Main Menu, you can change equipment, use items, and view character statuses.
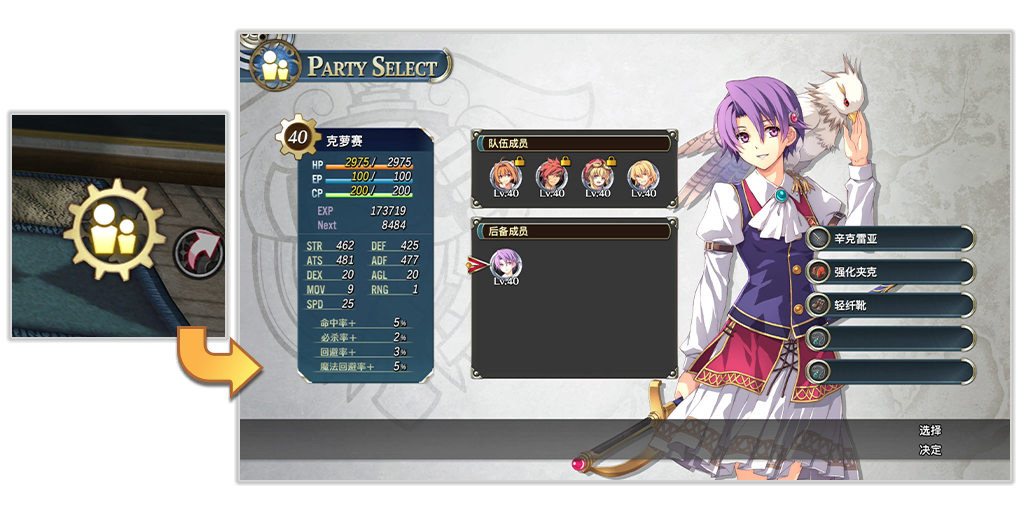
Press [control button] while in a guild (or other base) to open the Party Formation menu and build your preferred team.
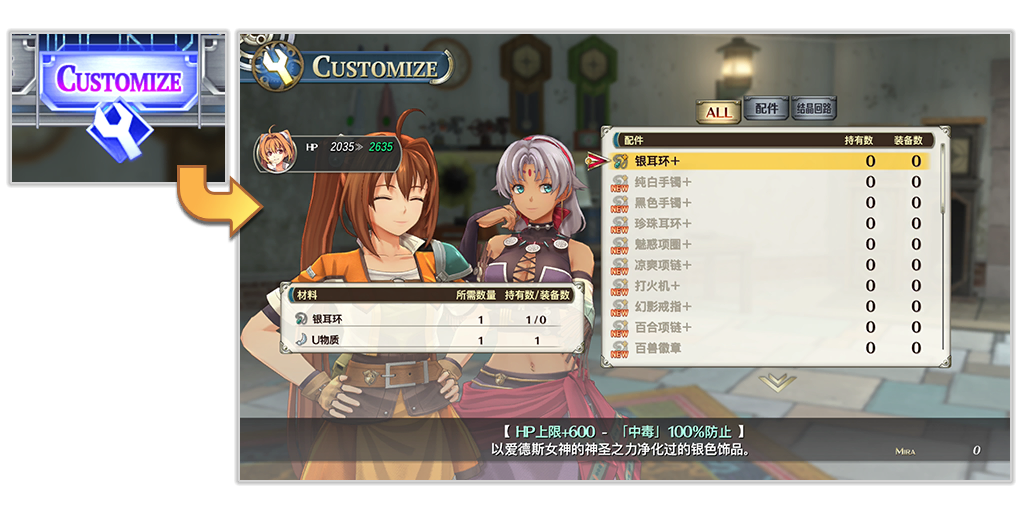
At orbal factory shops, you can use U-Material to enhance specific equipment and quartz. U-Materials can be found in various locations, so use them proactively!
You can adjust certain controls in the Options Menu.