Get familiar with movement, equipment switching, and resupplying before you start exploring.
Key references use the default bindings as examples; after rebinding keys, refer to your in-game settings.
Detailed steps
Move with A / D and jump with Space. On a safe platform, practise sliding right with D + Left Shift.
Success signal:The character slides right and passes through a low opening.
Note:A slide requires a direction input together with left Shift; stay away from cliff edges.
At a one-way platform, press down+jump to drop to the next level; if you need to keep dropping through, release first, then press again. In a narrow shaft, get against the wall first, then jump in the opposite direction to wall-jump upward.
Success signal:The character passes through the one-way platform and lands securely. Jumping in the opposite direction after getting against the wall lets you reach a higher platform.
Note:Check the landing spot on the next level before dropping through the platform.
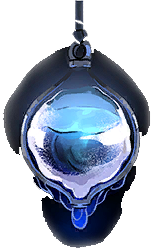
Open the relic list in Equipment. Select an item and press Enter, choose the target slot with A / D, then press Enter again.
Success signal:The new relic icon appears in the chosen slot.
Note:After selecting a relic, use A / D to switch the target slot; the third slot can also hold a relic.
First confirm you have potions; after taking damage, come to a stop on safe ground, hold X until the drinking animation finishes, then release it. Do not tap. If you changed the controls, use the in-game bindings. If you have no potions, go to an available save mirror to check supplies.
Success signal:The potion bottle count decreases, and health increases. If nothing changes, first confirm the drinking animation has finished.
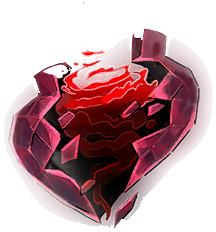
Note:Drink potions on safe ground, and wait for the animation to finish before moving or attacking. Healing potions cannot be used while Blackened Heart is equipped.
At an available save mirror, press the interact key E and wait for saving to finish before exiting the game.
Success signal:The game indicates that saving is complete. Step checkmarks and game saves are saved separately.
Note:Before leaving the game, confirm the saving notification has ended.
Reading progress management
Checked steps are stored only in this browser, separately from the game save.
Select the previously exported progress file to replace this game's progress in the current browser.
AllAll conditionsAnyAt least one conditionTopicChapter progressChaptersReading progress managementFilter by listed requirement statusSome listed conditions are not satisfiedSee the guide for preparation requirementsAll listed conditions are satisfiedSome listed conditions remain unconfirmedCollectedCollection modeCollection overviewCompleted {count} / {total}Results use your manual checklist. Unknown conditions remain unconfirmed.Check requirementsDefeatedNo relevant guides found. Try an item name, Boss name, or another area.EquippedExport progressExplore regionHideImport progressSelect the previously exported progress file to replace this game's progress in the current browser.Select a progress fileQuest guidesGo to stepPreview translation; native-speaker editorial review is not complete.Locate this stepLocate: {name}Step destinationsClick a map marker to return to the corresponding step.Steps on this mapZoom inZoom outReset map viewMark completeMechanism activatedShow images and rewardsMissingNext topicNext incomplete stepNoThis step has no recorded requirements to check yet. This does not mean it has no prerequisites.For this chapter, simply follow the text and illustrations.NotMust not be trueOwnedPoint details and related itemsPrevious topicClear this game's character checklist? The game save will not change.Checked steps are stored only in this browser, separately from the game save.Some steps changed. Check the updated instructions before marking them complete again.Progress exported.Step progress is saved in this browser only and does not affect the game save.Import failed: the file is invalid or belongs to a different game.Progress imported.Quest completedRecord only what you have confirmed in the game. This checklist does not read or modify the game save.Checklist saved in this browser.RegionRequirementsReset progressReset this checklistClear the completed steps in this chapter? The game save will not change.Reset this game's browser checklist and reading progress? The game save will not change.Continue readingRevealSatisfiedSearch Boss, items, or locationsFound {count} guides · {total} totalSkill unlockedShow all spoilersLater bossesEnding contentReduce spoilersOpening this guide shows the steps for this goal. Images and rewards can be revealed separately.View guideDetailed stepsBrowser storage is unavailable. Changes may be lost when this page closes.Find items, solve mechanisms, fight a Boss: view prerequisites, action steps, and map locations.Success signalSuccess signalRelated items and chaptersQuest guidesUnconfirmedUnknownNoteYes